
Creating a spider plant bonsai is a unique and creative way to style this popular houseplant. By shaping and training the plant, you can turn its cascading leaves into a compact and eye-catching display.
But how do you start a spider plant bonsai – and what care does it need to thrive?
Let’s explore the steps to transform your spider plant into a stunning bonsai centerpiece.
Table of Contents
Easy Spider Plant Care Guide 💚
⭐ Want one? Get your very own Spider Plant here
💧 Water: Water when the top inch of soil feels dry. Spider plants prefer slightly moist soil but can tolerate occasional drying out. Avoid overwatering to prevent root rot.
🌱 Soil: Use a well-draining potting mix - I personally use this potting mix - which works great, especially with added perlite for better aeration (like that one has).
☀️ Light: Bright, indirect light is ideal, but Spider plants are adaptable and can handle lower light. Avoid direct sunlight, which can cause the leaves to scorch.
🌡️ Temperature: Keep your Spider plant in a room between 65-75°F (18-24°C). They don’t like cold drafts or sudden temperature changes.
🌿 Fertilizer: Feed with a diluted, balanced fertilizer (my top pick is this Miracle-Gro one) once a month during the growing season. Hold off on fertilizing in fall and winter.
What Is a Spider Plant Bonsai?
Spider plant bonsai combines the art of bonsai with the unique characteristics of spider plants. This miniature version retains the spider plant’s signature arching leaves and plantlets, but in a compact, stylized form.
Origins and Description
Spider plant bonsai features long, narrow leaves that arch gracefully from a central rosette. The plant’s distinctive “spiderettes” – small baby spider plant plantlets that dangle from thin stems – give it its common name.
In bonsai form, spider plants are shaped to grow in shallow containers. Their roots are carefully pruned and leaves trimmed to maintain a small size.
The result is a great little miniature that showcases the plant’s natural beauty in a more controlled shape.
Spider plant bonsai typically range from 6 to 12 inches tall. They’re often displayed in decorative pots or on rock formations to enhance their aesthetic appeal.
Bonsai Versus Regular Spider Plants
Bonsai spider plants differ from their full-sized counterparts in several key ways. They’re much smaller, usually kept under a foot tall. Their growth is carefully controlled through pruning and root restriction.
Regular spider plants can spread up to 2-3 feet wide, while bonsai versions are kept compact. Bonsai specimens have fewer leaves and plantlets, but each one is carefully positioned for visual impact.
Care needs for smaller spider plants also vary. Bonsai spider plants require more frequent watering due to their smaller soil volume. They need regular pruning to maintain their shape, unlike regular spider plants that can grow freely.
Despite these differences, both types share the spider plant’s air-purifying qualities and easy-care nature. They’re non-toxic to pets, making them safe choices for homes with furry friends.
Starting Your Spider Plant Bonsai
Creating a spider plant bonsai is an exciting project that combines the art of bonsai with the easy-care nature of spider plants. It’s a great way to bring a unique touch of greenery to your home or office.
Choosing the Right Plant
Pick a healthy spider plant with vibrant, arching leaves and a compact growth habit.
Look for a plant with multiple offshoots or “spiderettes” – these will help create the desired bonsai shape. Young plants work best, as they’re easier to train and shape.
Choose a specimen with a strong central stem and well-developed roots. Avoid plants with yellowing leaves or signs of pest damage.
If possible, select a variegated variety for added visual interest. Remember, the plant you choose will be the foundation of your bonsai, so take your time to find the perfect one.
Initial Potting and Soil Requirements
Start with a shallow bonsai pot that’s slightly larger than the plant’s root ball. Ensure it has drainage holes to prevent waterlogging. Use a well-draining bonsai soil mix, like this pre-made one. You can also make this yourself if you prefer by combining equal parts potting soil, perlite, and coarse sand.
Gently remove the spider plant from its original container and trim any excessively long roots. Place a layer of soil in the bonsai pot, then position the plant. Fill in around the roots with more soil, pressing gently to remove air pockets.
Water your spider plant thoroughly after potting. Place the newly potted bonsai in a spot with bright, indirect light.
Allow the soil to dry slightly between waterings to encourage root development and prevent rot.
Cultivation Techniques
Creating a spider plant bonsai requires specific care and techniques. You’ll need to focus on pruning, watering, and providing the right environment for your miniature plant to thrive.
Pruning and Shaping
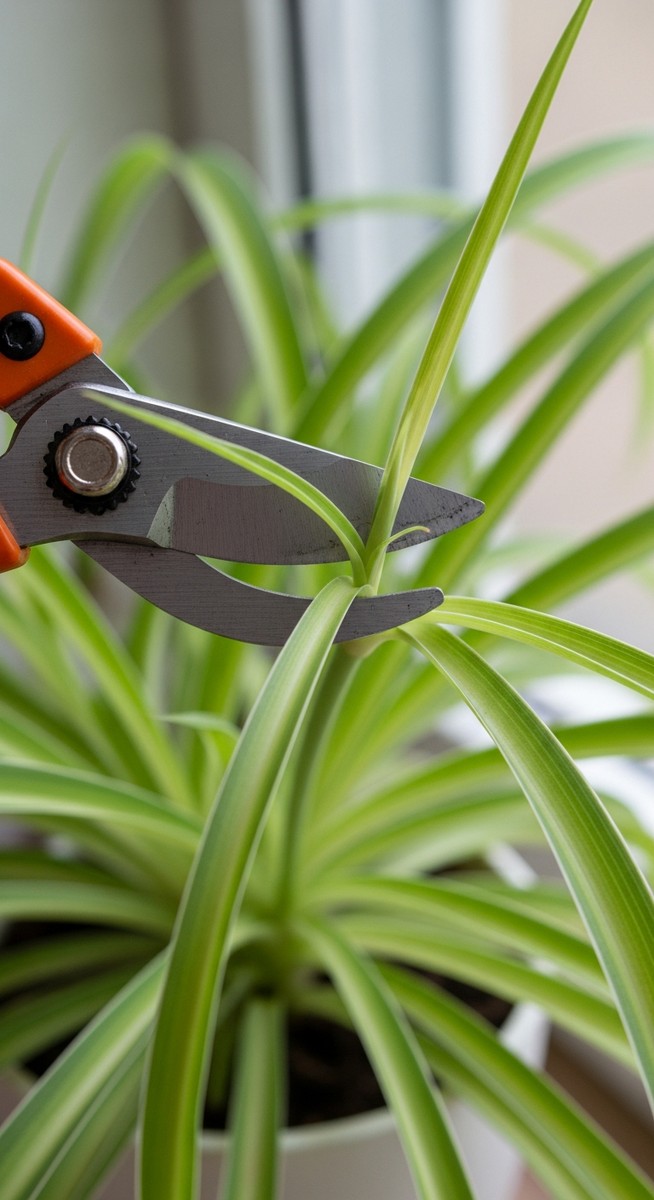
Pruning is key to maintaining the bonsai shape of your spider plant. Start by removing any yellowing or damaged leaves to promote healthy growth.
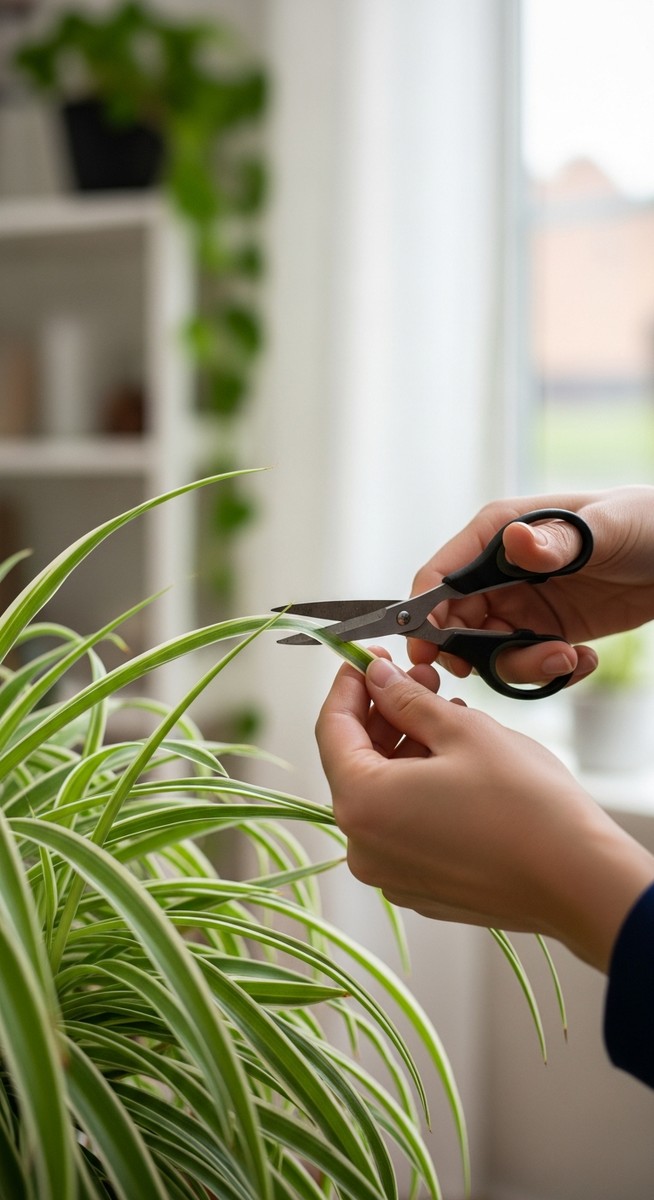
Trim the longest leaves to keep the plant compact. Use sharp, clean scissors to make precise cuts.
Shape your spider plant by gently wiring the stems. Be careful not to damage the delicate foliage.
Wrap thin wire around the stems and bend them into your desired form. Remove the wire after a few weeks to prevent scarring.
Regularly pinch off new growth at the tips to encourage bushiness. This will help your spider plant bonsai maintain its miniature size and shape over time.
Watering and Feeding
Spider plant bonsais need consistent moisture but can’t tolerate waterlogging. Water your plant when the top inch of soil feels dry.
Use room temperature water and avoid getting the leaves wet to prevent fungal issues.
During the growing season (spring and summer), water more frequently. In winter, reduce watering as the plant’s growth slows down.
Feed your spider plant bonsai with a balanced, water-soluble fertilizer every 2-4 weeks during the growing season – I like to use the one below.

Miracle-Gro Water Soluble All Purpose Plant Food
⭐⭐⭐⭐⭐
The best fertilizer for Spider Plants, boosting healthy foliage and encouraging new growth. Safe and effective for keeping your plant strong and thriving
Dilute the fertilizer to half strength to avoid burning the roots. Stop fertilizing in late fall and winter when the plant is dormant.
Light and Temperature Conditions
Spider plant bonsais thrive in bright, indirect light. Place your plant near a north or east-facing window for optimal growth.
If you notice the leaves becoming pale, move it to a brighter spot. Too much direct sunlight can scorch the leaves, so provide some shade during the hottest part of the day.
These plants prefer temperatures between 60-75°F (15-24°C). They can tolerate slightly cooler temperatures but will suffer if exposed to frost.
Keep your spider plant bonsai away from cold drafts and heating vents. Maintain moderate humidity around your plant.
If the air is dry, place a humidity tray filled with pebbles and water near the bonsai or mist the leaves occasionally.
Common Challenges
Spider plant bonsai growers face a few key obstacles. Pests can infest these miniature trees, causing damage to leaves and roots, and brown leaf tips are another issue that can mar the appearance of your bonsai.
Pests and Diseases
Spider mites and mealybugs are common pests that attack spider plant bonsai. You’ll notice tiny webbing or white, cottony masses on leaves and stems.
How to Get Rid of Pests on Your Houseplants
If you notice pests on your indoor plants, follow these steps to tackle the problem before it gets worse:
- Start with manual removal – For minor infestations, wipe leaves with a cotton swab dipped in rubbing alcohol or rinse the plant under lukewarm water to remove pests by hand.
- Use neem oil or insecticidal soap – If pests persist, treat your plant with neem oil or insecticidal soap (those are my preferred ones!), both of which target common houseplant pests without harming your plant.
- Apply a houseplant-safe pesticide – For severe cases that don’t respond to other treatments, use a broad-spectrum pesticide designed for indoor plants to eliminate stubborn pests – I use this pesticide for tough infestations.
By acting quickly and using the right treatments, you can keep your houseplants pest-free and thriving!
Root rot is a fungal disease that can affect overwatered plants. Check for mushy, dark roots and foul odors.
If you spot these signs, remove affected roots and repot in fresh, well-draining soil. Adjust your watering schedule to prevent future issues.
Leaf spot diseases may appear as brown or black spots on foliage. Remove infected leaves and improve air circulation around your bonsai.
Avoid overhead watering to keep leaves dry.
Dealing With Brown Leaf Tips
Brown leaf tips on your spider plant bonsai can be frustrating. This issue often stems from improper watering or mineral buildup.
Check your watering habits – both under and overwatering can cause tip browning.
Use filtered water or let tap water sit out overnight to reduce chlorine and fluoride levels. These chemicals can accumulate in soil and cause leaf burn.
Flush the soil every few months with clean water to wash away mineral deposits.
Low humidity can also lead to brown tips. Place a humidity tray filled with pebbles and water near your bonsai.
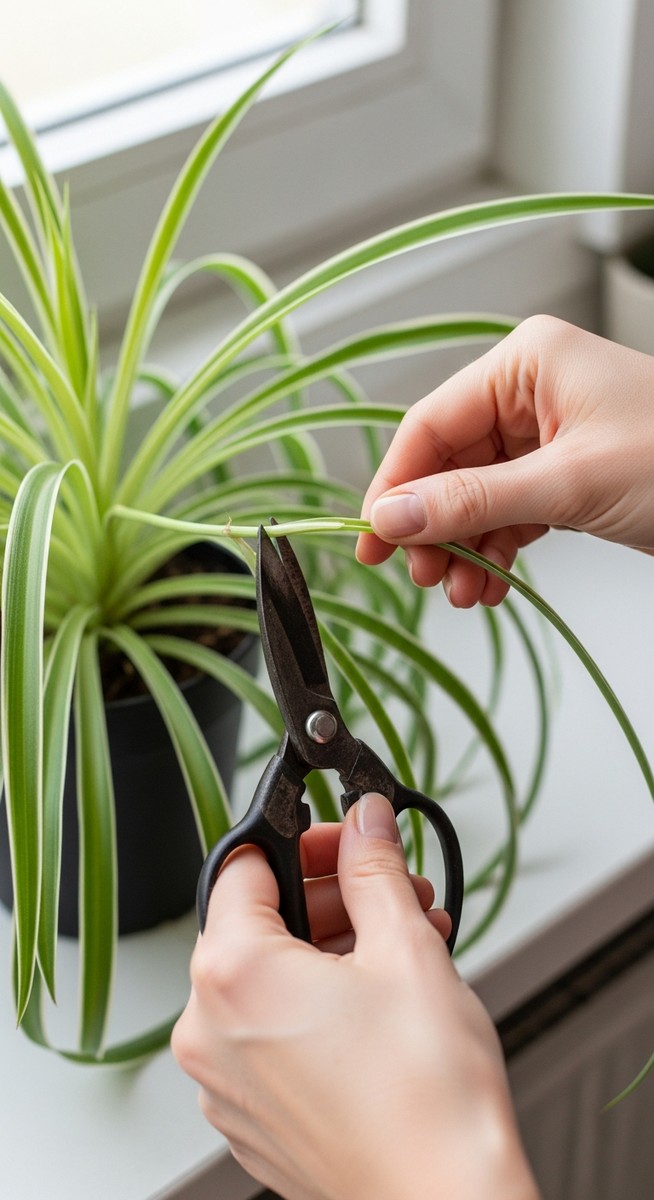
Mist leaves occasionally, but don’t overdo it as this can promote fungal growth. If brown tips persist, trim them off with clean, sharp scissors.
Cut at an angle to blend with the leaf’s natural shape. This won’t harm your bonsai and will improve its appearance.
Propagation Methods
Spider plant bonsai can be propagated through several effective methods. These techniques allow you to create new plants easily and expand your collection.
Each method has its own advantages and can be chosen based on your preferences and available resources.
Division
You can propagate spider plant bonsai by dividing mature plants. Start by gently removing the plant from its pot.
Shake off excess soil to expose the root system. Look for natural divisions or separate offshoots with their own roots.
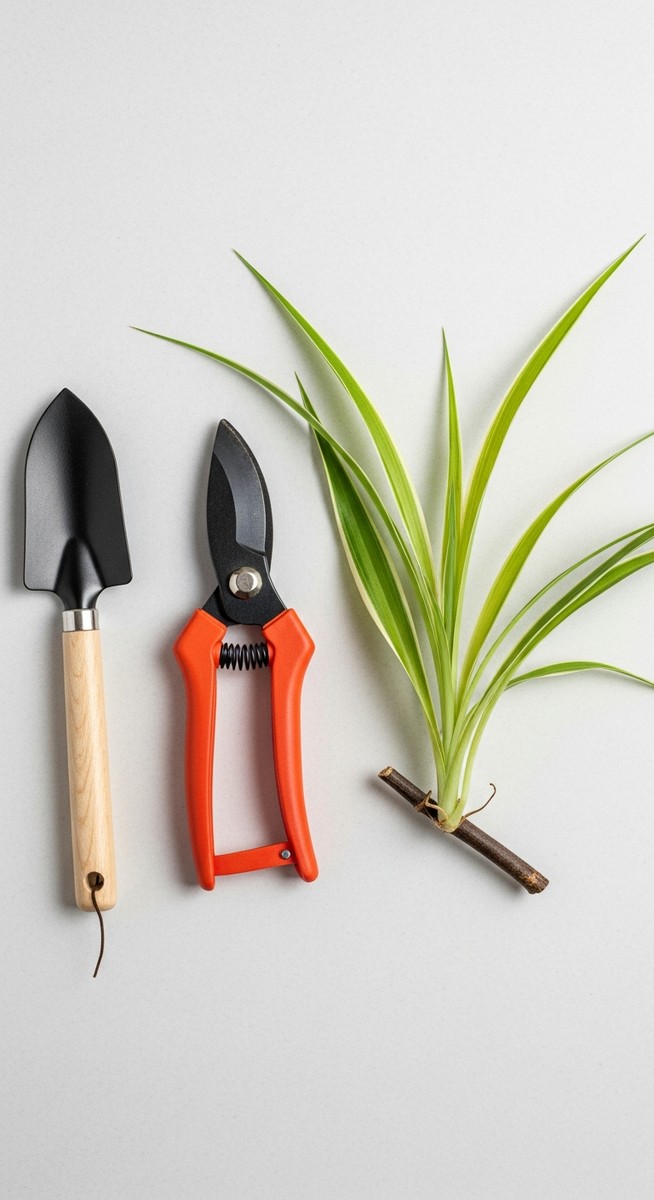
Use clean, sharp scissors or a knife to cut through the roots, ensuring each division has a good root system and several leaves.
Repot each division in a small container with fresh, well-draining soil, like the one below. Water thoroughly and place in a warm, bright spot out of direct sunlight.

Miracle-Gro Houseplant Potting Mix
⭐⭐⭐⭐⭐
The best soil for Spider Plants, designed to keep them thriving indoors. With excellent drainage and key nutrients, it promotes strong roots and vibrant, arching leaves.
Keep the soil moist but not waterlogged. New growth will appear within a few weeks, indicating successful propagation.
Seed Sowing
Propagating spider plant bonsai from seeds is less common but possible. Collect seeds from mature seed pods on your existing plants.
Sow them in a tray filled with moist, sterile seed-starting mix. Cover lightly with soil and place in a warm area with indirect light.
Keep the soil consistently moist using a spray bottle. Germination typically occurs within 2-3 weeks.
Once seedlings develop their first true leaves, transplant them into individual pots. Be patient – it takes longer to grow a bonsai-sized plant from seed compared to other methods.
Rooting Spiderettes
This is the easiest and most popular method for propagating spider plant bonsai. Spiderettes are the small plantlets that grow on long stems from the mother plant.
Choose a healthy spiderette with some roots already forming. You can root it in water or directly in soil.
For water rooting, place the spiderette in a glass of water, ensuring the base is submerged. Change the water every few days.
Roots will develop within 1-2 weeks. Once roots are about an inch long, plant in soil.
To root directly in soil, press the base of the spiderette into moist potting mix. Keep the soil consistently damp.
Gently tug on the plantlet after a few weeks – resistance indicates successful rooting. You can then begin shaping your new spider plant bonsai.
Repotting and Maintenance
Repotting and maintenance are crucial for keeping your Spider Plant Bonsai healthy and thriving. Regular care ensures proper growth and prevents common issues.
When and How to Repot
Spider Plant Bonsais need repotting every 2-3 years. Look for roots peeking out of drainage holes or slow growth – these are signs it’s time.
Choose a pot 1-2 inches larger than the current one. Gently remove the plant, trim about 1/3 of the roots, and place it in fresh, well-draining bonsai soil.
Water thoroughly after repotting. Don’t fertilize for a month to let the roots settle.
Spring is the best time for this task, as the plant is entering its active growth phase. Be careful not to damage the delicate roots during the process.
Long-Term Care Tips
Water your Spider Plant Bonsai when the top inch of soil feels dry. These plants like consistent moisture but can’t stand soggy roots.
Mist the leaves regularly to boost humidity. Place your bonsai in bright, indirect light – too much direct sun can scorch the leaves.
Fertilize every 2-4 weeks during the growing season with a balanced, water-soluble fertilizer. Prune regularly to maintain the desired shape.
Remove any yellow or brown leaves to keep your bonsai looking its best. In winter, reduce watering and stop fertilizing as growth slows down.
Watch for pests like spider mites or mealybugs. If you spot any, treat then in the order I outlined above.
With proper care, your Spider Plant Bonsai can be a long-lasting, unique addition to your home.
Design and Display
Spider plant bonsai combines the art of miniaturization with the natural beauty of Chlorophytum comosum. This unique approach creates striking living sculptures that can enhance any space, giving you a whole new world of décor ideas for your spider plant.
The design focuses on shaping the plant’s form while showcasing its distinctive arching leaves and cascading offshoots.
Selecting Containers
Choose shallow, wide pots to accommodate the spider plant’s spreading root system. Bonsai containers typically have drainage holes and are made of ceramic, clay, or plastic.
Opt for neutral colors like earth tones or soft pastels to complement the plant’s green foliage.
The pot size should be proportional to the plant – a good rule of thumb is to select a container about 1/3 the height of the foliage.
Consider the weight of your chosen pot, especially if you plan to move your bonsai frequently. Lightweight materials like plastic can be practical for this purpose.
Make sure the container is sturdy enough to support the plant as it grows and produces offshoots.
Spider Plant Bonsai Décor Ideas
Place your spider plant bonsai in a spot with bright, indirect light to show off its graceful form. A corner shelf or side table near a north-facing window can be ideal.
You can also create an eye-catching display by grouping several bonsai at different heights.
Use decorative elements like small rocks or moss to enhance the bonsai’s appearance. These additions can create a more natural look and help retain moisture.
Consider rotating your bonsai periodically to ensure even growth and maintain its shape. This practice also allows you to appreciate your creation from different angles.
Frequently Asked Questions
Spider Plant Bonsai care involves specific watering, lighting, and pruning techniques. These miniature plants require regular attention to maintain their unique shape and health.
How do I take care of a Spider Plant Bonsai?
You’ll need to water your Spider Plant Bonsai regularly and place it in bright, indirect light. Prune the leaves and roots periodically to maintain its compact size. Feed it with a balanced, water-soluble fertilizer every few weeks during the growing season.
Keep an eye on the soil moisture – it should be slightly damp but not waterlogged.
Repot your bonsai every 1-2 years using a well-draining bonsai soil mix. This will help refresh the nutrients and prevent the roots from becoming too crowded.
What are the best tips for growing a Spider Plant Bonsai indoors?
Choose a spot with plenty of indirect sunlight for your Spider Plant Bonsai. A north or east-facing window is often ideal. Maintain humidity around the plant by using a pebble tray or misting regularly.
Rotate the plant every few weeks to ensure even growth. Keep it away from drafts and heat sources, as Spider Plants prefer consistent temperatures.
Use a small pair of scissors for precise pruning to maintain the desired shape.
How often should I water my Spider Plant Bonsai?
Water your Spider Plant Bonsai when the top inch of soil feels dry to the touch. This usually means watering once or twice a week, but it can vary depending on your home’s conditions. Always check the soil before watering to avoid overwatering.
During winter, you might need to water less frequently as the plant’s growth slows down. Make sure the pot has drainage holes to prevent water from sitting at the bottom and causing root rot.
What are common issues to look out for when growing a Spider Plant Bonsai?
Brown leaf tips often indicate low humidity or over-fertilization. Increase humidity and reduce fertilizer if you notice this issue. Yellowing leaves can be a sign of overwatering or poor drainage.
Watch out for spider mites, which can be spotted by looking for tiny webs on the leaves. If you see pests, treat the plant with insecticidal soap.
Root rot is another concern – if the plant seems wilted despite moist soil, check the roots for signs of decay.