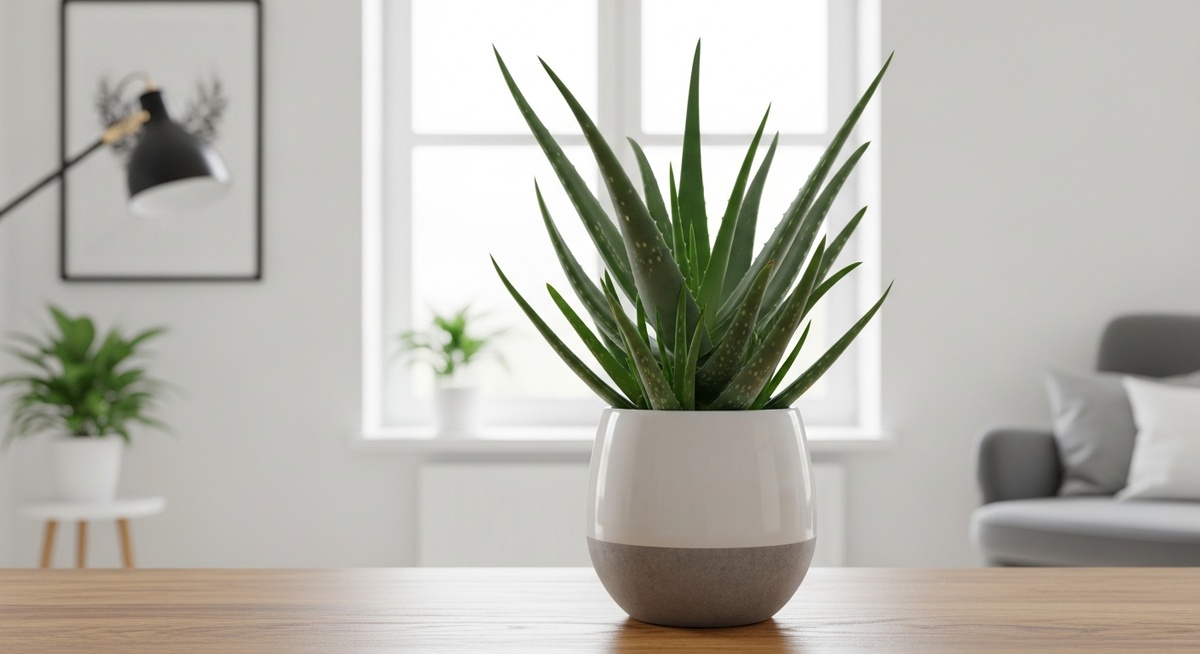
Aloe vera plant care is simple and rewarding, making this succulent a popular choice for homes and offices. Its soothing gel and striking leaves add both function and beauty to your space.
But what does it take to keep aloe vera thriving – and how can you avoid common care mistakes?
Let’s cover the essentials to help your aloe vera plant stay healthy and vibrant.
Table of Contents
Easy Aloe Vera Care Guide 💚
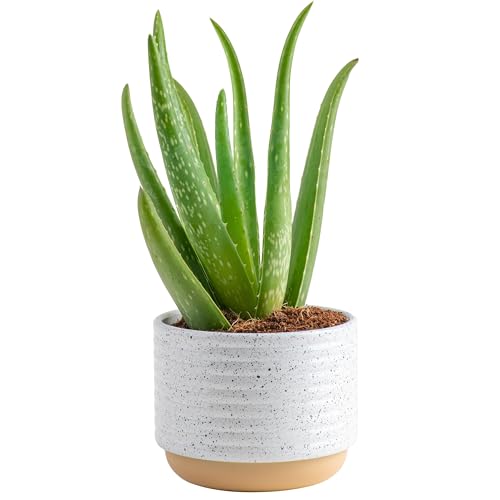
⭐ Want one? Grab your very own Aloe Vera plant here!
💧 Water: Allow the soil to dry out completely between waterings. Aloe Vera thrives on infrequent watering - too much water can lead to root rot.
🌱 Soil: Use a well-draining cactus or succulent mix - I personally use this succulent mix. Adding sand or perlite to a standard potting mix can improve drainage.
☀️ Light: Bright, indirect light is best, but Aloe Vera can handle some direct sunlight. Avoid prolonged exposure to harsh midday sun, which can cause sunburn.
🌡️ Temperature: Keep your Aloe Vera in a room between 55-80°F (13-27°C). They prefer warmer conditions but can tolerate cooler temperatures as long as they’re above freezing.
🌿 Fertilizer: Feed with a diluted succulent fertilizer or a low-nitrogen fertilizer (e.g., 10-40-10) once in the spring and again in mid-summer. Aloe Vera doesn’t need much feeding although, when it does, my top pick is this Miracle-Gro fertilizer).
Picking the right aloe vera plant
When starting with aloe vera, choosing a healthy plant and gathering necessary materials ensures success. Pay attention to the plant’s condition and get suitable supplies like containers, soil, and sunlight. Setting up these basics helps your aloe vera thrive.
Select a plant that’s green, firm, and free from blemishes. These are signs of good health.
Avoid plants with droopy or discolored leaves, which could mean they’re unhealthy or damaged. It’s also best to opt for medium-sized plants since they establish more quickly than smaller ones.
Aloe vera is available in many garden centers and online stores – like the one at the link below!
If you do go to choose one in-person, be sure to check for healthy roots, making sure they’re white or light brown and free from decay. Be wary of plants with roots circling the pot too tightly, as they may be root-bound.
How to make your aloe vera plant thrive
To help your Aloe Vera flourish, consider several key aspects. Focus on sunlight exposure, appropriate watering techniques, and selecting the right soil mix.
Proper humidity levels and airflow are also crucial for maintaining healthy growth.

Best soil and pot for aloe vera
Choose a well-draining potting mix for Aloe Vera. Cactus or succulent mixes are great options, as they retain less moisture and ensure good drainage. If you choose a different type, you can enhance aeration by mixing sand, perlite, or pumice into the soil.
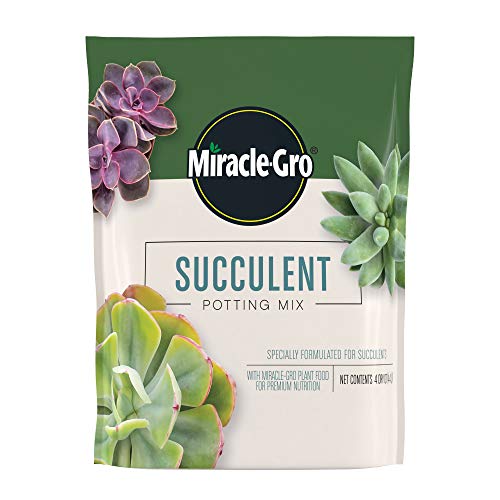
Miracle-Gro Succulent Potting Mix
⭐⭐⭐⭐⭐
The best soil for Aloe Vera, specially formulated for succulents. A fast-draining mix with peat moss and plant food to keep roots healthy and prevent overwatering
The pot is equally important. Opt for a terracotta or clay pot with drainage holes. These materials absorb excess moisture, reducing the risk of root rot, unlike plastic pots which retain water.
Size matters too – select a pot that’s slightly larger than the root ball, giving your plant room to grow. Avoid oversized pots though, as they can hold too much moisture.
Repot your Aloe Vera every couple of years, or when it outgrows its container. This not only provides fresh soil but also prevents it from becoming root-bound, encouraging healthy development.
What’s the best light and temperature for aloe vera plants?
Aloe Vera plants thrive in bright, indirect sunlight. Place your plant in a west or south-facing window, where it can get plenty of light without direct sun exposure that could scorch the leaves. If your plant turns brown, it might be getting too much direct sunlight.
In that case, consider providing some shade or moving it a bit away from the window.
Temperature is another vital factor. Keep your Aloe Vera in a room where temperatures range between 60°F to 75°F (15°C to 24°C).
These plants aren’t fond of extreme cold, so avoid exposing them to temperatures below 50°F (10°C). Additionally, sudden temperature changes can stress the plant, so try to maintain a consistent indoor climate.
During the winter months, you might need to adjust the plant’s location as sunlight intensity decreases. You might also think about using a grow light to supplement lighting if your indoor environment lacks natural light.
When to water aloe vera
Aloe Vera prefers infrequent watering, allowing the soil to nearly dry out between each session. Overwatering is a common mistake, as these plants can tolerate drought more than soggy conditions. Check the top 1-2 inches of the soil to ensure they’re dry before watering again.
It’s ideal to water every 2 to 3 weeks during the active growing season, but always adjust based on your specific conditions. During the winter, when growth slows, you should water less often, to prevent waterlogging the roots.

Water deeply but infrequently, making sure excess water drains out from the pot. Using a pot with drainage holes is essential to avoid the risk of root rot, which is caused by stagnant water at the base.
Humidity requirements for aloe vera
Aloe Vera favors low to moderate humidity levels, similar to typical indoor environments. High humidity can create conditions for mold or fungal problems, so maintaining a balanced environment is key. If your home is overly humid, use a dehumidifier to maintain optimal levels.
Good airflow is important for healthy growth. Ensure your Aloe Vera is in a spot with sufficient air circulation, but avoid drafts from AC units or heaters. These can dehydrate the plant or lead to temperature fluctuations, causing stress.
To further enhance airflow, occasionally rotate your plant. This helps ensure even growth and prevents any leaf crowding. When watering, avoid getting water on the foliage, as this can hinder transpiration – the natural process that helps your Aloe Vera breathe and stay healthy.
Daily and seasonal care routine
Caring for aloe vera involves consistent daily attention and slight seasonal adjustments to maintain its health. In particular, adequate light exposure, watering, and temperature management are crucial.
Regular maintenance tips
Aloe vera requires indirect sunlight for about six to eight hours each day. Too much direct exposure can damage the leaves. Place the plant near a sunny window that provides ample light without being too harsh.
Watering is crucial but infrequent. Let the soil dry out between waterings. Typically, watering every two to three weeks will suffice. In the summer, you may need to water slightly more.
When watering, ensure drainage is adequate to prevent root rot. Use pots with drainage holes and a well-draining cactus or succulent soil mix.
Check your plant regularly for pests and diseases. Aloe vera is generally resilient, but pests like mealybugs can occasionally be a problem.
How to Get Rid of Pests on Your Houseplants
If you notice pests on your indoor plants, follow these steps to tackle the problem before it gets worse:
- Start with manual removal – For minor infestations, wipe leaves with a cotton swab dipped in rubbing alcohol or rinse the plant under lukewarm water to remove pests by hand.
- Use neem oil or insecticidal soap – If pests persist, treat your plant with neem oil or insecticidal soap (those are my preferred ones!), both of which target common houseplant pests without harming your plant.
- Apply a houseplant-safe pesticide – For severe cases that don’t respond to other treatments, use a broad-spectrum pesticide designed for indoor plants to eliminate stubborn pests – I use this pesticide for tough infestations.
By acting quickly and using the right treatments, you can keep your houseplants pest-free and thriving!
Seasonal care adjustments
With the changing seasons, light, temperature, and watering needs might alter. During winter, aloe vera goes dormant, requiring less water – around once a month. Ensure it’s placed in a location that maintains a temperature of at least 50°F (10°C).
In spring and summer, you may notice more growth. Consider a mild fertilizer in early spring to support this growth. Use a balanced, water-soluble fertilizer for your aloe vera at half strength (like my preferred one below!)
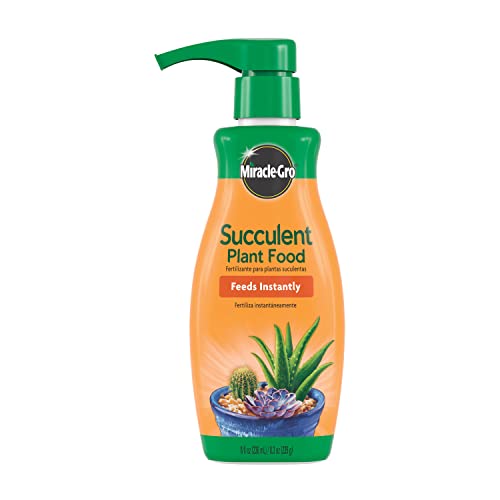
Miracle-Gro Succulent Plant Food
⭐⭐⭐⭐⭐
The best fertilizer for Aloe Vera, specially formulated for succulents. A liquid plant food that feeds instantly, promoting strong roots and healthy, vibrant growth
Watch for changes in leaf color as seasons change, which can indicate stress. Adjust light and water accordingly to maintain a healthy green hue.
Address occasional repotting in spring if the plant outgrows its container. This helps promote maximum health and growth by providing fresh soil and space.
Repotting aloe vera
Aloe Vera plants thrive in well-draining soil and need adequate space for growth. Repotting every couple of years helps manage root growth and nutrient uptake.
Follow these steps for successfully transplanting your Aloe Vera plant.

Preparing to plant
Choose a pot with drainage holes to prevent water from sitting at the base. This helps avoid root rot, a common issue with Aloe Vera. Opt for a terra-cotta or ceramic pot as they allow the soil to dry out between waterings.
Use a sand-based potting mix. A cactus or succulent soil mix works well. If you prefer, make your own by mixing equal parts potting soil, sand, and perlite. This helps ensure the needed drainage.
Miracle-Gro Succulent Potting Mix
⭐⭐⭐⭐⭐
The best soil for Aloe Vera, specially formulated for succulents. A fast-draining mix with peat moss and plant food to keep roots healthy and prevent overwatering
Prior to planting, water the potting mix lightly. Let excess moisture drain out. When you plant, position Aloe Vera in the center of the pot. The lower leaves should rest just above the soil surface. This encourages upright growth.
How to repot your aloe vera
Repot when roots become visible through drainage holes. This usually happens every two to three years. Start by carefully removing the plant from its current pot. Gently brush away excess soil from the roots.
Trim any damaged or excessively long roots with sterilized scissors. This keeps the plant healthy and manageable. Choose a slightly larger pot to give roots room to grow.
Fill the new pot with fresh potting mix. Place the plant into the pot, ensuring it sits upright. Backfill with soil, leaving about an inch of space below the rim. Water thoroughly but don’t saturate. Allow the soil to dry before watering again.
Pruning your aloe
Pruning and grooming your aloe plant helps it stay healthy and look its best. Removing dead or damaged leaves prevents disease and improves appearance. Proper techniques are key for promoting growth.
When to prune aloe vera
Timing is crucial in keeping your aloe plant vibrant. Prune it during the growing season, which typically runs from spring to late summer. This is when the plant is most resilient and can recover quickly from any cuts. Look for leaves that are brown, dying, or damaged, as these should be removed promptly.
Avoid pruning in late fall or winter. During these times, the plant is less active, and pruning can cause stress.
Additionally, if you see any signs of disease or pest infestations, address those immediately to avoid further damage to the plant’s health. Careful observation throughout the year ensures you only prune when necessary, maintaining an aesthetically pleasing and healthy plant.
Pruning techniques
Start with clean, sharp tools to ensure clean cuts. Scissors or small pruning shears work best. Cut the damaged or dead leaves at their base, close to the stem, to avoid leaving any stubs. This minimizes the risk of disease and encourages new growth.
For dead flowers, deadhead them by removing the flower stalk at the base. Be gentle during this process so you don’t harm the healthy parts of the plant. Always disinfect your tools before and after pruning to prevent the spread of disease.
Regular inspection of your aloe helps identify which parts need attention, supporting sustained growth and vitality.
Propagating aloe vera plants
Aloe Vera can be propagated using various methods. Pups and offshoots are dependable ways to expand your garden, while the leaf cutting technique offers an experimental approach. Understanding these methods will help ensure successful propagation and plant growth.
Pups and offshoots
Aloe Vera naturally produces pups, or offshoots, that grow around the base of the mother plant. These pups can be separated and repotted to create new plants. Choose pups that are at least a few inches tall and have a few leaves growing.
To separate, gently remove the mother plant from its pot and identify the pups. Use a sharp, clean knife to cut the pup away from the parent plant, ensuring it has some roots attached.
Allow the cut end to callous for a day or two before planting it in well-draining soil. After planting, water it lightly and place it in indirect sunlight.
It’s important to monitor the new plant as it establishes its root system and begins to grow.
Leaf cutting technique
Leaf cutting is a more adventurous propagation method. Begin by choosing a healthy, mature leaf from the plant. Using a clean, sharp knife, cut the leaf close to the stem. Allow the cutting to dry for several days until a callous forms on the cut end.
Once calloused, plant the end of the leaf cutting in a pot with well-draining soil. Keep the soil slightly moist but avoid overwatering, which can lead to rot.
Place the pot in bright, indirect sunlight and be patient, as roots may take several weeks to form. Although this method has a lower success rate, it can be a rewarding experiment.
Pest prevention and treatment
Aloe Vera plants can attract pests, but with proper care, you can prevent infestations. Vigilance and regular maintenance play key roles.
If pests are spotted, timely and effective treatments can help maintain a healthy plant.
Identifying common pests
Aphids, mealybugs, and spider mites frequently target Aloe Vera. Aphids are tiny, green or black insects that cluster on new growth. Mealybugs look like small cottony masses on leaves, hiding in leaf joints. Spider mites form fine webbing and tiny yellow spots on leaves.
How to Get Rid of Pests on Your Houseplants
If you notice pests on your indoor plants, follow these steps to tackle the problem before it gets worse:
- Start with manual removal – For minor infestations, wipe leaves with a cotton swab dipped in rubbing alcohol or rinse the plant under lukewarm water to remove pests by hand.
- Use neem oil or insecticidal soap – If pests persist, treat your plant with neem oil or insecticidal soap (those are my preferred ones!), both of which target common houseplant pests without harming your plant.
- Apply a houseplant-safe pesticide – For severe cases that don’t respond to other treatments, use a broad-spectrum pesticide designed for indoor plants to eliminate stubborn pests – I use this pesticide for tough infestations.
By acting quickly and using the right treatments, you can keep your houseplants pest-free and thriving!
Ensure proper ventilation and avoid overwatering, as soggy conditions encourage infestations. You might also consider introducing beneficial insects like ladybugs for natural pest control.
Troubleshooting common issues
Aloe Vera plants can face several problems that affect their health and appearance. Understanding these issues helps maintain a thriving plant, especially when it comes to key concerns like yellowing leaves, wilting, root rot, and diseases.
Yellowing leaves
Leaves turning yellow often indicate overwatering or too much sunlight. Ensure your plant is in indirect light and check the soil moisture – it should be dry before you water again. A well-draining potting mix can prevent excessive water retention.
Nutrient deficiencies might also cause this issue. Using a balanced fertilizer during the growing season can help maintain healthy foliage.
Inspect for pests like spider mites, which can also cause discoloration and treat accordingly. Trim off any damaged leaves to encourage new growth.
Wilting or drooping
If your Aloe Vera is wilting or drooping, it’s often because of underwatering or low temperatures. Water the plant thoroughly when the soil feels dry, but ensure excess water can drain.
The plant thrives in temperatures above 55°F, so keep it away from drafts. If the issue persists, consider repotting to check the root health.
Sometimes, compacted roots can struggle to absorb moisture. Ensuring adequate light, warmth, and water balance is key.
Root rot and overwatering signs
Root rot is a common result of overwatering and poor drainage. If your Aloe Vera’s leaves feel soft and mushy, it’s likely a sign. Remove the plant from its pot and check the roots. Healthy roots are firm, so look for any that are brown or slimy.
Trim away any rotted sections and repot the plant in fresh, well-draining soil. Using a terracotta pot can help wick away excess moisture.

Allow the soil to dry completely before the next watering session to prevent recurrence.
Common aloe vera diseases
Disease in Aloe Vera can manifest as leaf spots or mildew. Fungal infections thrive in humid environments, so maintain good air circulation around your plant. Remove and dispose of any infected leaves to prevent spread.
Avoid getting the foliage wet when watering, and ensure your plant isn’t overcrowded. In extreme cases, a fungicidal treatment might be necessary. Being vigilant for spots or unusual discoloration helps catch these diseases early, ensuring your plant remains healthy.
How to harvest aloe vera gel
Cutting aloe vera leaves properly is crucial for both the plant’s health and optimal gel extraction. Start by choosing mature, healthy leaves near the plant’s base. Using a sharp knife or scissors, cut the leaf at the base where it meets the stem. This minimizes damage to the plant and promotes regrowth.
Let the cut leaf stand upright for a few minutes to allow the yellow latex to drain, as it can be irritating to the skin. Once drained, use a knife to remove the spiky edges along each side of the leaf.
Slice the leaf open lengthwise and use a spoon to scoop out the clear gel. Collect it in a clean container, and you’re ready to store it for later use.
Storing aloe vera gel
Proper storage extends the shelf life of aloe vera gel. Once you’ve extracted the gel, transfer it immediately to an airtight container to prevent contamination. Store the container in the refrigerator, where the gel can last up to a week.
For longer storage, consider freezing it. Spoon the gel into ice cube trays, freeze, and then transfer the cubes to a freezer-safe bag. This method keeps the gel usable for several months.
You may also blend the gel with a bit of vitamin E or C to enhance preservation, but ensure to mix thoroughly before freezing or refrigerating.
Types of aloe vera plants
Several Aloe Vera types are popular for home growing and therapeutic use. Aloe barbadensis miller is the most common, recognized for its thick, fleshy leaves and high gel content. Aloe vera var. chinensis, characterized by its thinner leaves, is another variant often found in household gardens.
When you’re selecting a plant, consider the specific traits to fit your needs. Aloe plants vary in size and gel potency, which can affect their suitability for your environment or specific use. It’s important to know what you’re getting, as not all species offer the same benefits.
Growing different types might need slightly varied care, but they generally require well-drained soil and bright, indirect sunlight. Keep them in a spot where they’re not exposed to frost, and ensure they don’t sit in water for long.
Aloe vera benefits
The benefits of Aloe Vera are abundant and well-documented. Its gel is celebrated for moisturizing the skin and aiding in the healing of minor burns and cuts. It’s rich in vitamins A, C, and E, which are essential for skin health.
Aloe Vera supports digestive health when consumed in safe quantities, aiding in digestion and reducing inflammation in the gut. It’s also known to have natural antibacterial and antioxidant properties, making it useful in managing skin conditions.
When applying Aloe Vera gel, ensure it’s from a safe source, and consider doing a patch test if you’re using it for the first time. This plant is a beneficial addition to both your home and health routine due to its versatile nature and ease of use.
FAQs
Caring for your aloe vera plant involves watering schedules, suitable pot choices, sunlight exposure, and proper maintenance like trimming brown tips. These elements ensure your plant thrives indoors.
How frequently should I water my indoor aloe vera plant?
Water your indoor aloe vera once every 2-3 weeks. Allow the soil to dry out completely between waterings to prevent root rot. Overwatering is a common mistake, so it’s crucial to monitor soil moisture levels.
Environmental conditions like temperature and humidity can affect how quickly soil dries. Adjust watering schedules accordingly. During winter months, aloe vera typically requires less water due to reduced growth activity.

What type of pot should I use for planting aloe vera indoors?
Choose a pot with drainage holes to prevent water accumulation. Terracotta pots are ideal as they allow excess moisture to evaporate, helping maintain a balanced soil environment.
The size of the pot should be proportionate to the aloe’s size, providing enough room for root growth. Re-potting every couple of years can facilitate healthy plant development.
Plus don’t forget to pick a pot for your aloe vera that matches your home decor!
Is direct sunlight beneficial or harmful to aloe vera plants?
Aloe vera thrives in bright, indirect sunlight. Direct sunlight can cause leaf scorching, especially during intense midday hours. Position your plant near a window with filtered light for optimal growth.
If the plant receives too little light, it may become leggy or grow slowly. You can rotate the plant regularly to ensure all sides receive light evenly.
When is the right time to trim or remove brown tips from my aloe plant?
Trim brown tips as soon as they appear to keep your plant healthy. Use clean, sharp scissors to prevent damage. Brown tips often result from overwatering or insufficient light.
Regular trimming encourages new growth and maintains the plant’s appearance. If browning persists, reassess your care routine to identify underlying issues.