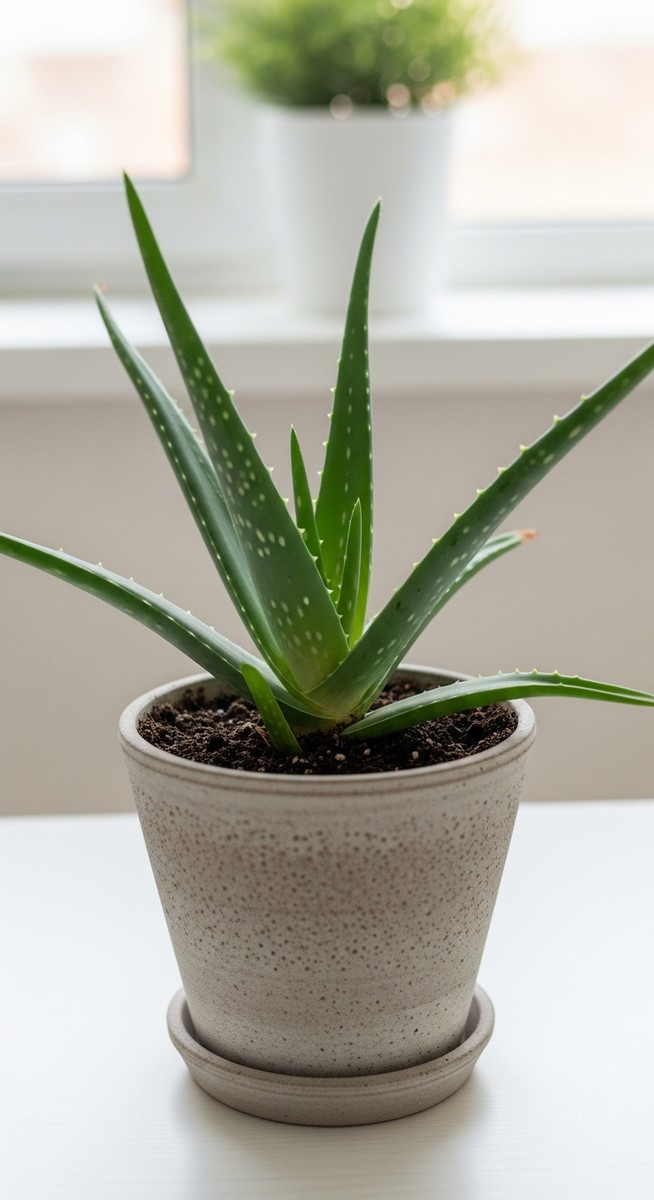
Transplanting an aloe vera plant might seem tricky, but it’s an important step to keep it healthy and growing. Whether it’s outgrown its pot or needs a refresh, a successful transplant can make all the difference.
But when is the right time to transplant – and how can you do it without harming the plant?
Let’s walk through the steps to safely and effectively transplant your aloe vera.
Table of Contents
Easy Aloe Vera Care Guide 💚
⭐ Want one? Grab your very own Aloe Vera plant here!
💧 Water: Allow the soil to dry out completely between waterings. Aloe Vera thrives on infrequent watering - too much water can lead to root rot.
🌱 Soil: Use a well-draining cactus or succulent mix - I personally use this succulent mix. Adding sand or perlite to a standard potting mix can improve drainage.
☀️ Light: Bright, indirect light is best, but Aloe Vera can handle some direct sunlight. Avoid prolonged exposure to harsh midday sun, which can cause sunburn.
🌡️ Temperature: Keep your Aloe Vera in a room between 55-80°F (13-27°C). They prefer warmer conditions but can tolerate cooler temperatures as long as they’re above freezing.
🌿 Fertilizer: Feed with a diluted succulent fertilizer or a low-nitrogen fertilizer (e.g., 10-40-10) once in the spring and again in mid-summer. Aloe Vera doesn’t need much feeding although, when it does, my top pick is this Miracle-Gro fertilizer).
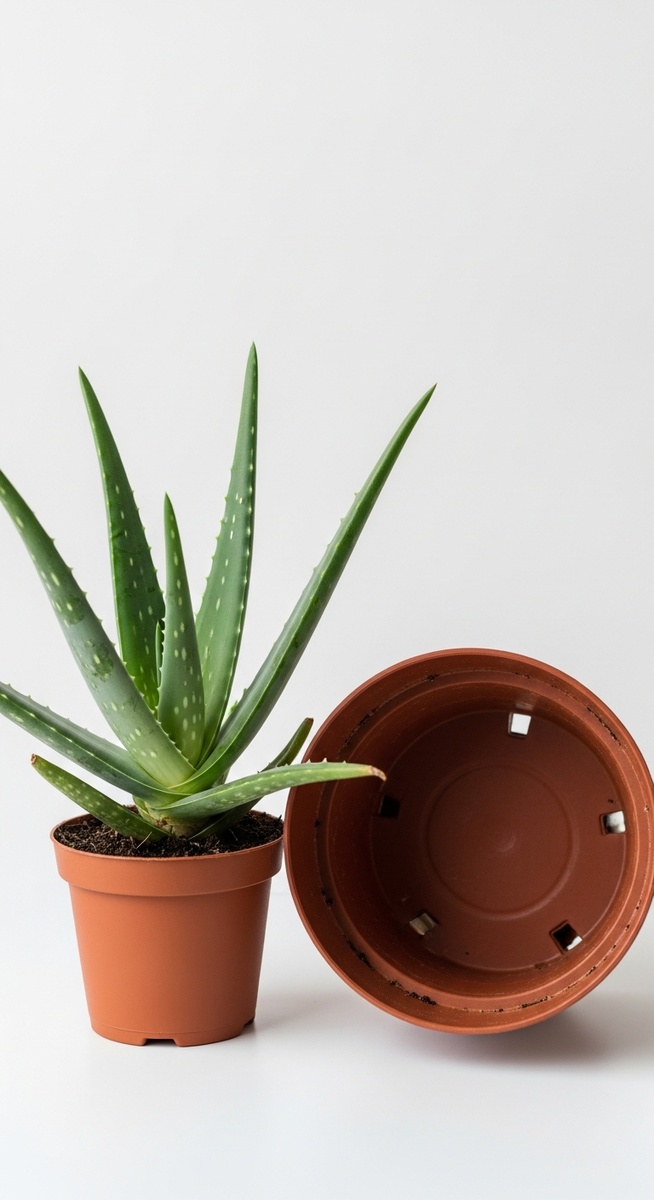
Selecting a new pot
Choosing the right pot for your Aloe Vera plant is essential for healthy growth. The size and material of the pot, along with drainage features, significantly impact the plant’s well-being. It’s important to carefully consider each factor to ensure your Aloe Vera thrives.
Best pot for your aloe vera plant
The size of the pot is crucial. Too small a pot can stifle growth, while a pot that’s too large might hold too much moisture, leading to root rot. Ideally, your pot should be approximately 1-2 inches larger in diameter than the current root ball.
Choosing the material also makes a difference. Terracotta pots are popular for their breathability, allowing moisture to evaporate more efficiently.
On the other hand, plastic pots, while lightweight and typically inexpensive, might retain moisture longer. This can be fine as long as you adjust your watering routine to prevent overwatering.
In brief, consider how frequently you’ll be watering and the climate conditions in your area when picking the pot’s material.
Drainage considerations
Proper drainage is non-negotiable for aloe vera plants. You’ll need a pot with enough drainage holes to prevent water from accumulating at the bottom, which can harm the roots.
You can enhance drainage by adding a layer of stones or broken pottery pieces at the bottom. This helps create airflow and ensures excess water drains more effectively.
If you’re dealing with a decorative pot that lacks holes, use it only as a cover pot and keep the plant in a separate container with adequate drainage.
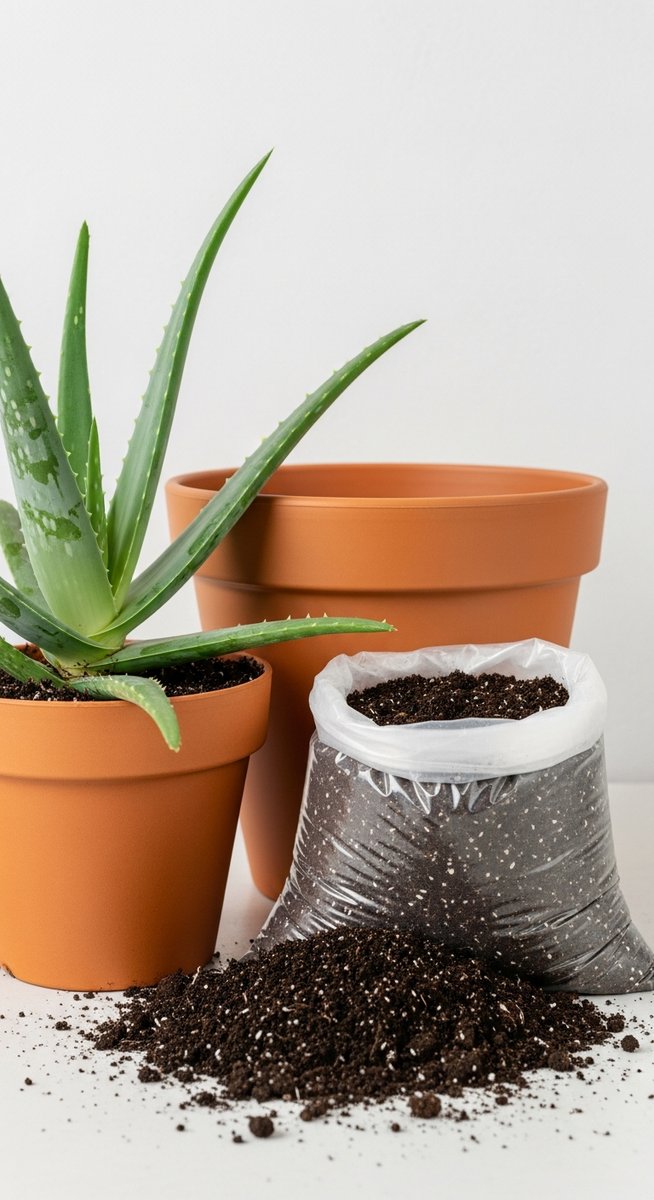
Preparing the new soil
Creating the right soil mix is crucial for the healthy growth of a transplanted aloe vera plant. Consider the soil’s components and ensure it has the necessary pH balance. Sterilization prevents pests and diseases from harming your plant.
Best soil for your aloe vera plant
Aloe vera needs a well-draining potting mix to thrive, like a specially designed succulent or cactus soil. If you want to use regular potting soil, make sure to mix it with sand or perlite for better drainage. This ensures the soil doesn’t retain too much moisture, which can lead to root rot.
It’s definitely going to be easier to just buy a potting mix that’s aimed at these plants – exactly like my preferred one below.
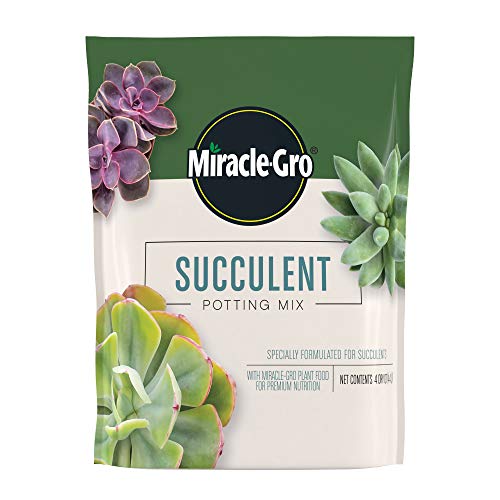
Miracle-Gro Succulent Potting Mix
⭐⭐⭐⭐⭐
The best soil for Aloe Vera, specially formulated for succulents. A fast-draining mix with peat moss and plant food to keep roots healthy and prevent overwatering
The ideal pH for aloe vera is between 6.0 and 7.0. While most store-bought potting mixes will have the right pH, checking the pH level may be a good idea if you’re mixing it yourself (or if you really like this part of the plant process!)
You can test and adjust the pH using kits available at garden centers. If needed, adding lime can increase pH, while sulfur can help decrease it.
Before the transplant
Before transplanting an Aloe Vera plant, take essential steps to ensure its successful growth and adaptation.
Consider the plant’s health, the right timing, and gather necessary tools before proceeding. Proper preparation is key to a stress-free transition for your plant.
Assessing plant health
Start by checking the overall condition of your Aloe Vera plant. Healthy plants usually have firm, green leaves and no visible signs of disease or pests.
How to Get Rid of Pests on Your Houseplants
If you notice pests on your indoor plants, follow these steps to tackle the problem before it gets worse:
- Start with manual removal – For minor infestations, wipe leaves with a cotton swab dipped in rubbing alcohol or rinse the plant under lukewarm water to remove pests by hand.
- Use neem oil or insecticidal soap – If pests persist, treat your plant with neem oil or insecticidal soap (those are my preferred ones!), both of which target common houseplant pests without harming your plant.
- Apply a houseplant-safe pesticide – For severe cases that don’t respond to other treatments, use a broad-spectrum pesticide designed for indoor plants to eliminate stubborn pests – I use this pesticide for tough infestations.
By acting quickly and using the right treatments, you can keep your houseplants pest-free and thriving!
If any leaves are wilting or yellowing, consider cutting them off before transplanting.
Take a close look at plant roots if possible. They should be firm and white, not mushy or dark. Infections or rot in the root system should be addressed before moving the plant. Catching these issues early can save the plant.
Lastly, avoid transplanting if your plant is flowering. The stress of both flowering and re-rooting can be too much for the plant, leading to poor recovery. Wait until flowering has concluded for a safer transplant.
When to transplant aloe vera plants?
Timing is crucial for transplant success. The best period to transplant Aloe Vera is during its active growth phase, typically in the spring or early summer. The plant is more resilient and quick to adapt during these months.
Avoid transplanting in extreme weather conditions. Both scorching heat and cold temperatures can stress the plant, making it difficult for it to establish itself in a new environment. Indoor plants should also be considered if external conditions aren’t ideal.
Furthermore, ensure that the soil where you’re planting stays consistently moist. Doing so supports root development and encourages the plant to take hold faster, improving the chances of a successful transplantation.
How to transplant aloe vera plants
Transplanting an Aloe Vera plant involves a few clear steps to ensure healthy growth. You’ll begin by carefully removing the plant from its current pot, followed by a thorough inspection of its roots. Finally, you’ll replant it into a fresh pot with the right conditions for a thriving Aloe Vera.
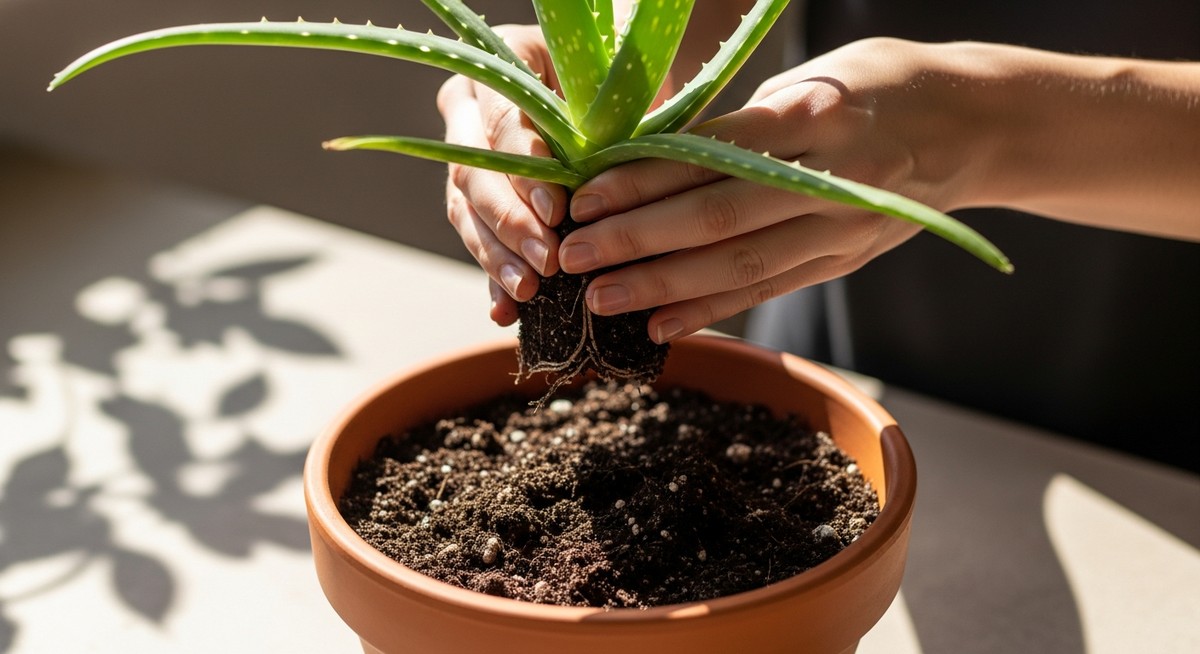
1. Remove aloe vera from its old pot
Start by gently turning the pot on its side. Tap the bottom to loosen the soil, allowing you to slide the plant out without damage.
If the plant is stuck, use a small tool or your fingers to go around the edges and loosen compacted soil. Take care not to pull too hard, which might damage the roots.
Once removed, shake off excess dirt so you can better inspect the root ball. Be mindful of the leaves and outer stems – they’re prone to snapping.
Having a helper hold the leaves as you handle the roots can prevent breakage.
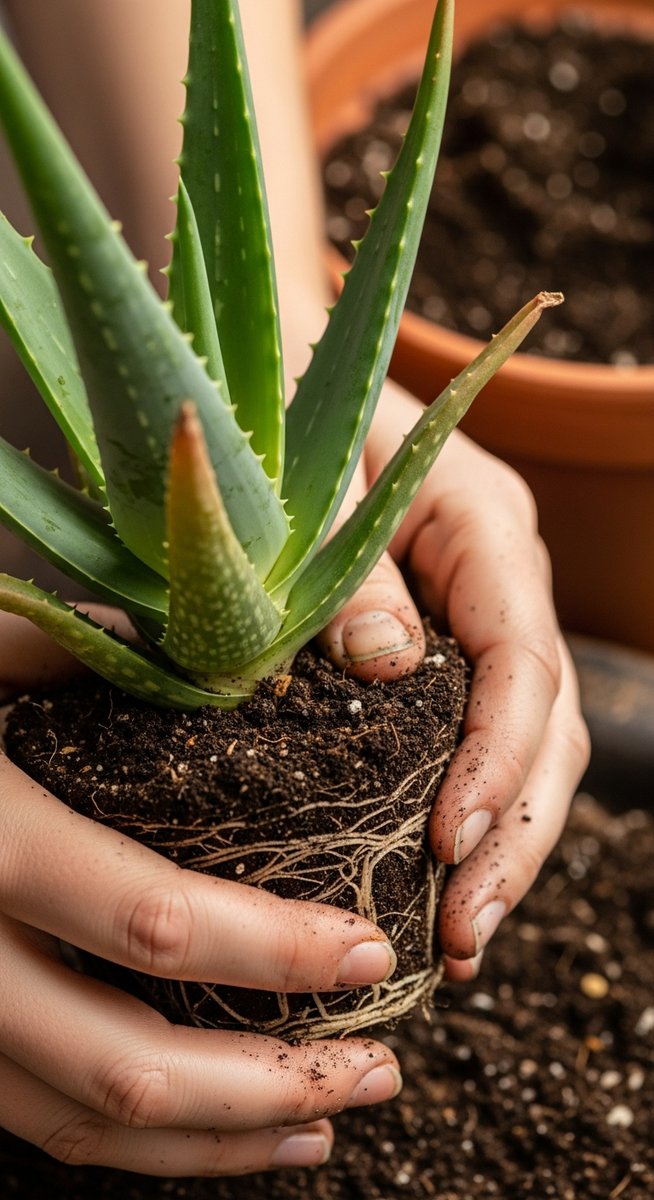
2. Inspect the roots and trim if needed
After removing the plant from its old pot, examine the roots closely. Look for any brown, mushy sections that could indicate rot. These damaged parts need trimming for healthy growth. Use sterilized scissors to cut away the dead or damaged roots.
Healthy roots should feel firm and look white. If you find a considerable amount of rot, consider reducing watering in the future to avoid mold growth.
After trimming, let the roots dry out for a few hours before planting again, reducing the chance of rot when watered.
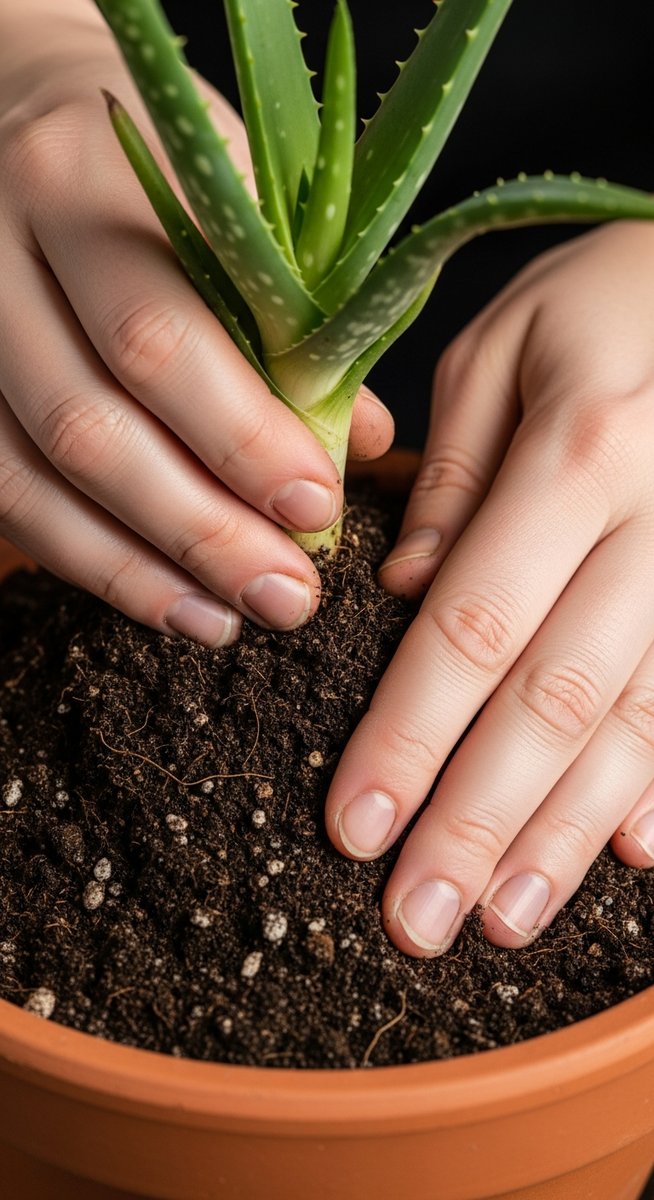
3. Place it in the new pot
Choose a pot that’s one size larger than the previous one. Make sure it has drainage holes.
Fill the bottom with potting mix designed for succulents. Aloe Vera thrives in well-draining soil, so mix sand or perlite into the potting soil if needed.
Place the Aloe Vera in the center, ensuring roots are spread out. Add more soil around the roots, gently pressing to remove air pockets but without compacting the soil.
Water the plant lightly – the soil should be moist but not drenched. Place the pot in a bright location, but avoid direct sunlight for a few days to help the plant adjust to its new environment.
Post-transplant care
Caring for your aloe vera after transplanting requires attention to watering, light, and stress symptoms.
Proper hydration helps the plant adapt to its new environment, while suitable lighting supports healthy growth. Keep an eye out for any stress signs, so you can address issues promptly.
Should you water newly transplanted aloe vera?
Water the plant sparingly to let the roots establish in the fresh soil. Initial watering should be thorough but don’t water again until the soil’s top inch feels dry. Aloe vera prefers drier conditions, so avoid overwatering, which can lead to root rot.
Use well-draining soil to assist with appropriate moisture levels. Clay pots are excellent for promoting better drainage. Consider using a moisture meter to check the soil’s moisture level if you’re unsure when to water.
Providing adequate light
Place your aloe in a spot with bright, indirect sunlight. Direct sunlight can be too intense for new transplants, causing leaf burn. South or west-facing windows often provide the best lighting conditions.
If your location lacks natural light, you can use grow lights. Keep artificial lights around 12-18 inches above the plant. Rotate the plant every few days to ensure even light exposure on all sides.
Monitoring for stress signs
Watch for signs of transplant shock like wilting or leaf discoloration. These symptoms can indicate overwatering, underwatering, or insufficient light. Address these issues promptly to help the plant recover.
Adjusting the environment can combat stress. Improve light levels or reduce watering based on the plant’s response.
Remember, new transplants need time to adjust, so be patient and consistent with your care routine.
Propagation from offshoots
Growing Aloe Vera from offshoots is a simple way to expand your collection. These offshoots, or pups, develop near the base of the parent plant. They’re easy to separate and nurture into full-grown plants.
Separating offshoots
Begin by examining the base of your Aloe Vera for pups. These small plants should be at least a few inches tall and have a couple of their own roots.
Carefully remove the parent plant from its pot, and gently brush away excess soil to reveal the offshoots.
Use a clean, sharp knife to separate the pup from the mother plant. Be sure to include some roots with the offshoot.
After separating, let the pup’s cut surface dry for a day or two. This step helps prevent rot when the pup is replanted.
Potting and caring for pups
Once the cut area is dry, it’s time to pot the pup. Choose a small pot with drainage holes to prevent water accumulation.
Fill it with a well-draining cactus or succulent potting mix. Make a small hole and place the pup into the soil, ensuring the roots are well-covered but the base of the leaves is above the soil line.
After planting, water lightly and place in a bright, indirect light. Regular care includes watering every couple of weeks.
Ensure the soil dries out completely between waterings to avoid overwatering. With patience and the right care, your aloe vera pup will grow into a robust plant.
FAQs
Transplanting an aloe vera plant involves specific techniques to ensure its health. Proper soil, pot size, and handling processes are crucial to avoid transplant shock and promote growth.
How can I repot my aloe vera if it has a long stem?
You should gently remove the plant from its current pot while keeping the root ball intact. Cut the stem close to the base and allow the cut to dry out for a few days. Plant the aloe in fresh soil, covering the base of the stem slightly.
Extra support, like small rocks, may be needed until roots stabilize the plant. Ensure the pot has drainage holes for excess water.
Avoid watering immediately after repotting to let the wound heal and establish roots.
What type of soil is ideal for planting aloe vera indoors?
Use a well-draining potting mix specifically for succulents or cacti. The soil should be a blend of sand, perlite, and potting soil to prevent water retention. Commercial succulent mixes are often best but can also be made at home.
Avoid garden soil, as it compacts and doesn’t drain well. Too much moisture can lead to root rot. Mixing your soil allows control of moisture retention and ensures a healthier plant environment.
What steps should I follow to minimize transplant shock in aloe vera?
Minimize disturbance to the roots during repotting by being gentle when removing the plant from its pot. Water the Aloe vera a few days prior to repotting to keep the roots hydrated. After transplanting, keep the plant in a shaded area for a week.
Avoid fertilizing immediately, as this can stress the plant. Monitor the plant for any signs of stress, such as drooping leaves, and adjust its environment or care as needed.
Can I propagate aloe vera from a cutting and how?
Yes, you can propagate from a cutting by removing a healthy leaf from the base of the plant. Let the leaf dry for about a week until a callus forms over the cut surface. Plant the leaf in well-draining soil, ensuring it’s upright and stable.
Keep the soil slightly moist but not soggy during root development. New roots will start forming within a few weeks, and growth can be encouraged by maintaining stable moisture levels.
How should aloe vera pups be separated and replanted?
Identify pups, or offsets, that have their own root systems, often growing around the base of the mother plant. Gently dig them out without damaging the roots. Let them dry for a day before replanting in individual pots with suitable soil.
Ensure they’re planted at the same depth they were originally growing. Water sparingly after a few days to help them establish without overwhelming their developing roots.
What size pot is best when repotting an aloe plant?
Choose a pot that’s slightly larger than the current one, about 1-2 inches wider in diameter. The depth should allow room for the roots to spread and grow. Ensure the pot has drainage holes to help prevent water accumulation.
Materials like terracotta can enhance drainage by allowing water to evaporate through the container sides. Picking the right size keeps the Aloe from becoming root-bound while still fitting comfortably in its new home.