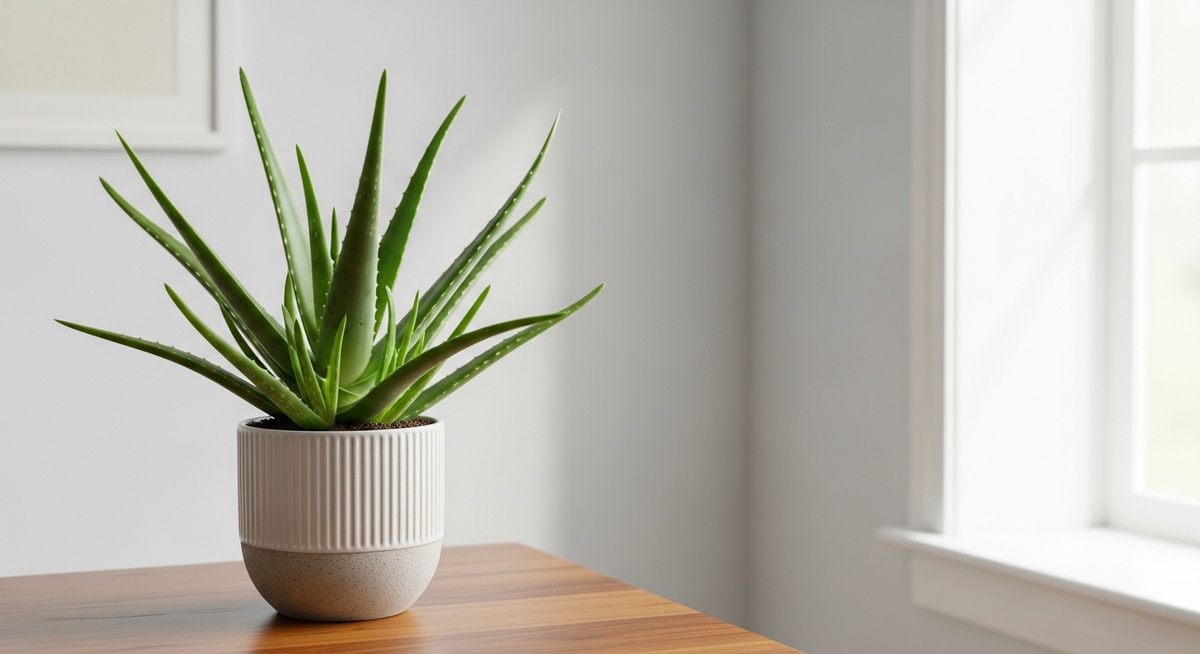
These aloe vera plant care tips will make sure you’re well equipped to keep this hardy succulent thriving with minimal effort. Known for its soothing gel and unique appearance, aloe vera is both practical and beautiful.
But what does it really need to stay healthy – and how can you avoid common care mistakes?
Let’s cover the essential tips to ensure your aloe vera plant grows strong and vibrant.
Table of Contents
Easy Aloe Vera Care Guide 💚
⭐ Want one? Grab your very own Aloe Vera plant here!
💧 Water: Allow the soil to dry out completely between waterings. Aloe Vera thrives on infrequent watering - too much water can lead to root rot.
🌱 Soil: Use a well-draining cactus or succulent mix - I personally use this succulent mix. Adding sand or perlite to a standard potting mix can improve drainage.
☀️ Light: Bright, indirect light is best, but Aloe Vera can handle some direct sunlight. Avoid prolonged exposure to harsh midday sun, which can cause sunburn.
🌡️ Temperature: Keep your Aloe Vera in a room between 55-80°F (13-27°C). They prefer warmer conditions but can tolerate cooler temperatures as long as they’re above freezing.
🌿 Fertilizer: Feed with a diluted succulent fertilizer or a low-nitrogen fertilizer (e.g., 10-40-10) once in the spring and again in mid-summer. Aloe Vera doesn’t need much feeding although, when it does, my top pick is this Miracle-Gro fertilizer).
1. Use well-draining soil
It’s important for your Aloe Vera’s overall care to plant it in well-draining soil to prevent root rot. Excess water can suffocate the roots, leading to plant failure. Choosing the right soil will keep your Aloe healthy and thriving.
Succulent or cactus potting mix is a great option because it allows water to drain quickly. In fact, that’s exactly the type that I recommend for aloe vera plants.
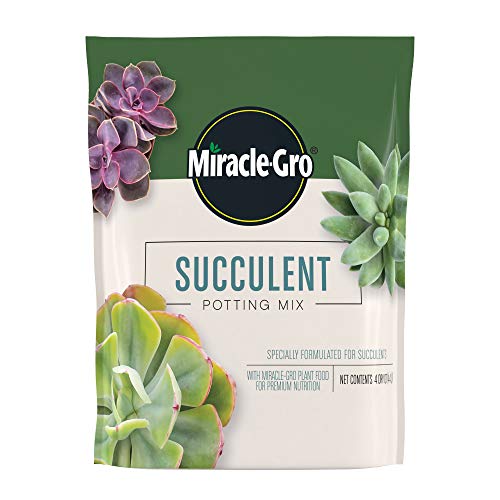
Miracle-Gro Succulent Potting Mix
⭐⭐⭐⭐⭐
The best soil for Aloe Vera, specially formulated for succulents. A fast-draining mix with peat moss and plant food to keep roots healthy and prevent overwatering
You can also make a custom blend by mixing regular potting soil with sand or perlite. This combination improves aeration and ensures excess moisture doesn’t harm the roots.
Using pots with drainage holes further helps in managing water retention. It allows excess water to escape, maintaining the ideal conditions for your Aloe plant.
And on that point…
2. Water when the soil is dry
Water your aloe vera only when the soil feels dry. Aloe vera plants don’t like to be overwatered. In fact, too much water can lead to root rot.
Check the soil moisture by sticking your finger about an inch deep into the pot. If it’s still moist, wait a few days before checking again. This will help prevent overwatering and stress on the plant.
When it’s time to water, thoroughly soak the soil, allowing it to drain through the pot’s holes. Make sure there’s no standing water left in the saucer underneath. This is crucial because aloe vera stores water in its leaves and doesn’t need constant hydration.
Consider using a pot with drainage to help control moisture levels. Make sure to adjust your watering frequency based on the season – less water is needed during cooler months.
3. Fertilize sparingly in spring and summer
Spring is the best time to fertilize your aloe vera. Use a diluted, high-quality, balanced liquid fertilizer or a cactus mix for best results – you can see my favorite one for these plants below.
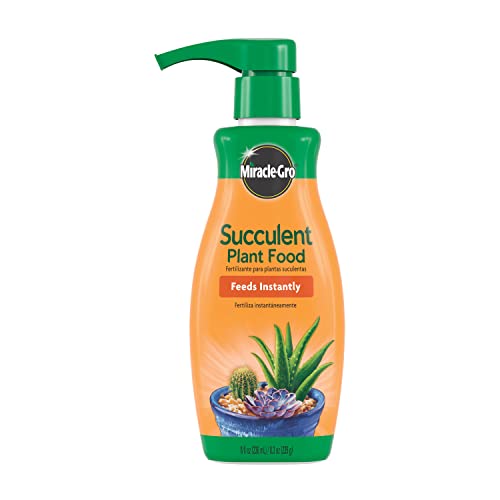
Miracle-Gro Succulent Plant Food
⭐⭐⭐⭐⭐
The best fertilizer for Aloe Vera, specially formulated for succulents. A liquid plant food that feeds instantly, promoting strong roots and healthy, vibrant growth
Fertilize once in the spring and again in mid-summer. Remember that too much fertilizer can harm aloe plants, so keep it light.
Dilute the fertilizer to half strength to prevent overfeeding. Aloe vera doesn’t need much, so a little goes a long way.
Check that the soil drains well before fertilizing. Good drainage helps prevent root rot, especially when adding nutrients.
Avoid fertilizing in the dormant months (fall and winter) because the plant doesn’t need extra nutrients then. Similarly, watch for signs of stress when fertilizing.
In particular, yellowing or wilting leaves can indicate over-fertilization. Adjust the amount if you notice these issues to keep your plant healthy.
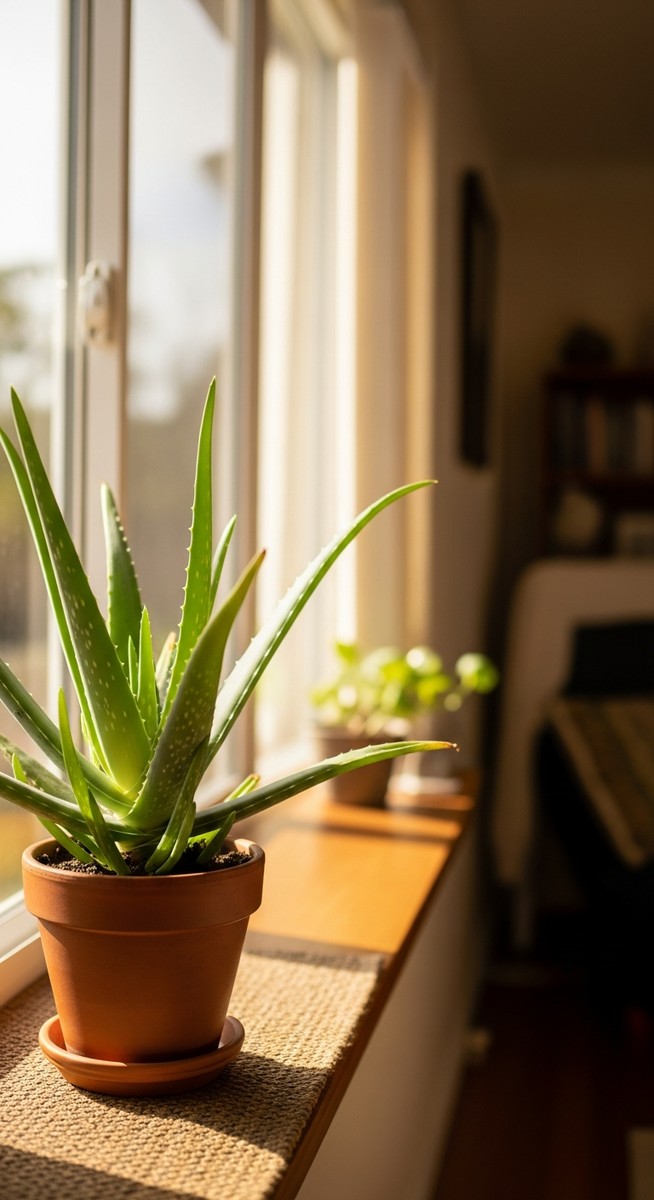
4. Place in bright, indirect sunlight
Aloe vera thrives in bright, indirect sunlight. Direct sunlight can scorch the leaves, so it’s important to avoid placing the plant in direct sun for long periods. A spot near a window where it can receive filtered light is ideal.
If you’re growing aloe indoors, an east or west-facing window works well. These locations allow the plant to soak up enough light without overexposure. Aim to rotate the plant occasionally to ensure even light distribution.
During the warmer months, you might consider moving your aloe so it gets more light outside. Just remember to keep it in a shaded area where it can enjoy indirect sunlight. This will help it grow healthy and strong without the risk of leaf burn.
5. Watch for pests like mealybugs
Mealybugs can be a real problem for aloe vera plants. They appear as white, cottony masses on your plant’s leaves and stems.
Regularly check your plant for these pests to catch them early and take action as soon as possible.
How to Get Rid of Pests on Your Houseplants
If you notice pests on your indoor plants, follow these steps to tackle the problem before it gets worse:
- Start with manual removal – For minor infestations, wipe leaves with a cotton swab dipped in rubbing alcohol or rinse the plant under lukewarm water to remove pests by hand.
- Use neem oil or insecticidal soap – If pests persist, treat your plant with neem oil or insecticidal soap (those are my preferred ones!), both of which target common houseplant pests without harming your plant.
- Apply a houseplant-safe pesticide – For severe cases that don’t respond to other treatments, use a broad-spectrum pesticide designed for indoor plants to eliminate stubborn pests – I use this pesticide for tough infestations.
By acting quickly and using the right treatments, you can keep your houseplants pest-free and thriving!
6. Avoid freezing temperatures
Your Aloe Vera plant isn’t built for the cold. It needs to be kept away from freezing temperatures to thrive. When temperatures dip below 50°F (10°C), it’s time to bring your plant indoors.
If you live in an area with cold winters, consider placing your Aloe Vera plant in a sunny, warm spot inside your home. A south-facing window works great.
Don’t forget to protect it from cold drafts. Close windows and doors that let in chilly air, and keep it away from air conditioners in summer.
When moving your plant indoors, make the transition gradual to prevent stress. If temperatures are expected to drop unexpectedly, consider using plant covers or bringing it in overnight.
Remember, nurturing your plant in the right environment ensures it remains healthy and vibrant.
7. Repot every 2-3 years
It’s important to repot your aloe vera plant every 2-3 years. This helps refresh the soil and gives the roots more space to grow. A bigger pot allows the plant to thrive.
When transplanting your aloe vera to its new planter , choose a pot that’s a bit larger than the current one. Ensure it has good drainage to prevent root rot. You should also replace old soil with fresh, well-draining potting mix.
Spring is the best time to repot. The plant’s growing season will help it adjust to its new environment. Be gentle when removing the plant to avoid damaging the roots.
After repotting, don’t water immediately. Wait about a week before the first watering. This allows the plant to settle and any root injuries to heal.
8. Trim dead leaves regularly
Trimming dead leaves from your aloe vera plant helps it stay healthy and look fresh. Removing these leaves allows the plant to focus its energy on new growth. It also prevents pests and diseases that can take advantage of decaying foliage.
Use clean, sharp scissors or pruning shears to make clean cuts close to the base. Make sure to wash your tools before and after trimming to prevent spreading any potential diseases. Be gentle so you avoid damaging other parts of the plant.
If you notice leaves turning brown or drying out, it’s time to remove them. Dead leaves can attract unwanted pests or diseases, which can impact the overall health of the plant.
Overall, regular trimming keeps your aloe vera plant looking vibrant and growing effectively.
9. Rotate the plant for even growth
Turning your aloe vera plant regularly helps ensure even growth. It prevents the plant from leaning toward the light source, which can cause uneven development. By rotating it about a quarter turn every week or two, you’ll keep your plant balanced and attractive.
Light sources can affect different parts of the plant, causing one side to grow more than another. This imbalance can lead to a tilted appearance. By simply adjusting its position periodically, you encourage all sides to get an equal amount of light.

Keeping track of your rotation schedule can help. Consider setting a reminder on your phone or jotting it down in your calendar.
As you consistently rotate your plant, you’ll likely notice a more uniform and healthier appearance. This small effort contributes significantly to maintaining its overall beauty and health.
10. Use a pot with drainage holes
It’s important to choose a pot with drainage holes for your Aloe Vera. These holes help prevent water from accumulating at the bottom, which can lead to root rot. Excess water needs an escape route, and drainage holes provide this.
Without proper drainage, your plant’s health might suffer. Waterlogged soil can cause mold and harm your Aloe Vera. The materials of the pot can be varied, but make sure they don’t block drainage.
If you notice water not draining, check for clogged holes. Place small rocks or pebbles at the bottom to improve drainage efficiency. Ensuring that your Aloe Vera has a draining pot contributes significantly to its well-being.
11. Wipe leaves to remove dust
Keeping the leaves of your aloe vera plant clean is important for its health. Dust can block sunlight, which your plant needs to thrive. Gently wiping the leaves helps ensure they get enough light.
Use a soft, damp cloth to wipe the leaves, avoiding any harsh chemicals. It’s good to do this every couple of weeks, especially if you notice a layer of dust forming. This simple task promotes a healthier plant environment.
Be careful not to use too much pressure though as aloe leaves can be sensitive. If you’re unsure about the water to use, opt for distilled or rainwater to prevent mineral buildup. Regular care keeps your aloe vibrant and thriving.
12. Avoid overwatering
Aloe Vera plants don’t need a lot of water. Giving them too much can cause root rot, which is harmful. It’s important to let the soil dry out between waterings.
Water your plant thoroughly, but let all the excess water drain out. Make sure the pot has good drainage holes. In winter, reduce watering frequency as the plant’s needs decrease.
Check the soil before watering by sticking a finger about an inch deep – if it’s dry, your plant is thirsty. Avoid letting the plant sit in water. Keep these tips in mind to keep your Aloe Vera healthy.
13. Use rainwater or distilled water, if possible
Rainwater and distilled water are excellent for aloe vera plants. They don’t contain the salts and chemicals often found in tap water, which can harm your plant over time.
Using these types of water helps prevent mineral buildup in the soil and keeps your aloe healthy. In particular, your plant will thrive when watered with rainwater, as it’s similar to what would occur in its natural habitat.
If collecting rainwater isn’t possible, consider using distilled water instead. It’s a great alternative since it’s free of many impurities.
Remember to water deeply and let the soil dry out between waterings. Aloes don’t need frequent watering, so using the purest water you can find helps avoid potential damage.
Whether you end up using rainwater or distilled water, keep them at room temperature to avoid shocking your plant.
14. Allow the plant to air dry after watering
After watering your aloe vera, it’s important to let it air dry. Allow any excess water in the soil to evaporate before you place the plant back in its spot. This helps prevent root rot and keeps your aloe healthy.
Aloe vera plants are sensitive to overwatering. Allowing them to air dry ensures the soil isn’t too moist. You’ll also want to ensure the pot has proper drainage holes.
Avoid moving your aloe vera immediately after watering. Give it some time to dry out. This practice is especially crucial if you’re growing the plant indoors, where airflow might be limited.
You can place your plant in a well-ventilated area for quicker drying. This technique is vital, especially during colder months when the drying process may be slower. Regularly checking the soil’s moisture level will further help in maintaining a healthy aloe vera.
15. Monitor for root rot
Root rot can be a serious issue for aloe vera plants. You’ll want to check the roots routinely for any signs of decay. Symptoms include darkened, mushy roots or a foul smell from the soil.
If you suspect root rot, gently remove the plant from its pot to inspect. Trim any affected roots with sterilized scissors or a knife. Allow the remaining healthy roots to dry out for a day or two before repotting in fresh soil.
Ensure the potting mix is well-draining, as excess moisture is a common cause. Water your aloe only when the soil is completely dry to prevent future problems. Always use a pot with drainage holes to help excess water escape.
Observing your plant closely will help you catch root rot early, ensuring your aloe stays healthy and happy. Frequent checks during times of high humidity or after heavy watering can help avert this issue.
16. Provide occasional fresh air
Aloe vera plants benefit from fresh air. Positioning them near an open window from time to time can help them thrive. Just remember not to put them in direct drafts.
When exposed to outdoor air, plants can experience better growth. This exposure helps them acclimate to changes in the environment. Moving your plant outside in mild weather can be beneficial.
Ensure the location outside doesn’t expose the plant to direct sunlight, as this can cause sunburn on its leaves. It’s also crucial to ensure the temperature isn’t too extreme.
Regular fresh air can help reduce the risk of mold and mildew on the soil. It encourages better air circulation and assists in maintaining healthy plant respiration.
17. Maintain temperature around 60-75°F (15-24°C)
It’s crucial to keep your aloe vera plant in an environment where the temperature stays between 60-75°F. This range ensures the plant remains healthy and avoids stress. When temperatures drop below this range, it can harm the plant.
Indoor temperatures are generally suitable for your aloe vera, especially in the cooler months. If your plant is outside during warmer seasons, be alert for sudden temperature changes. Bring it indoors when needed to protect it from cold drafts or heat waves.
Aloe vera doesn’t like frost or excessive cold. If your room gets chilly at night, consider moving the plant to a warmer spot. Consistent temperatures help maintain its vibrant green color and discourage pests or fungus that thrive in varying conditions.
You should also make sure that your aloe vera isn’t near heat sources like radiators that can dry it out. Keeping it in a fanless area is also a good idea.