I may be biased but honestly, in my opinion, a Monstera moss pole can make all the difference in terms of how spectacular this plant can look in a room. And there’s the added bonus that they’re good for your Swiss Cheese plant too!
That is, Monstera plants are tropical plants originally from the rainforests of Central and South America. These vining plants begin life on the forest floor or in trees under the canopy of the taller trees and climb their way to the light that filters through the canopy.
This is why, as houseplants, Monsteras thrive in similar conditions and so can really benefit from a moss pole to climb.
Keep reading to find out all about what these are, how they work and how to train your Monstera to climb a moss pole.
Table of Contents
Easy Monstera Care Guide 🌿
⭐ Want one? Grab a classic Monstera here or a smaller Monstera Adansonii here!
💧 Water: Water when the top 2-3 inches of soil feel dry. Monsteras prefer consistent moisture but don’t like sitting in soggy soil.
🌱 Soil: Use a well-draining potting mix - I personally use this tropical potting mix. A mix with peat, perlite, or coco coir is great for avoiding soggy roots.
☀️ Light: Bright, indirect light is ideal. Direct sunlight can scorch their leaves, while low light may slow growth.
🌡️ Temperature: Monsteras thrive between 65-85°F (18-29°C). Keep them away from drafts and sudden temperature changes.
🌿 Fertilizer: Feed with a balanced, water-soluble fertilizer (my top pick is this Miracle-Gro one) once a month during spring and summer. Skip feeding in fall and winter.
Does my Monstera need a moss pole?
A Monstera plant will need a moss pole or some other support structure to climb. Without one, many Monstera plants will cascade over pots and containers as they grow. This is because, in its natural habitat, a Monstera will use aerial roots attached to trees to support itself as it climbs.
If your Monstera plant does not climb, it may not mature and produce the dramatic foliage for which it is famous. This is because immature Monstera plants have small heart-shaped leaves in shades of green, but do not develop the beautiful patterns of variegated Monstera varieties. In turn, their Monstera leaves won’t split or develop fenestrations.
Because of this, to encourage your Monstera plant to reach its full maturity and develop foliage with striking splits and holes, a moss pole or other support is recommended.
What’s the best moss pole for Monstera?
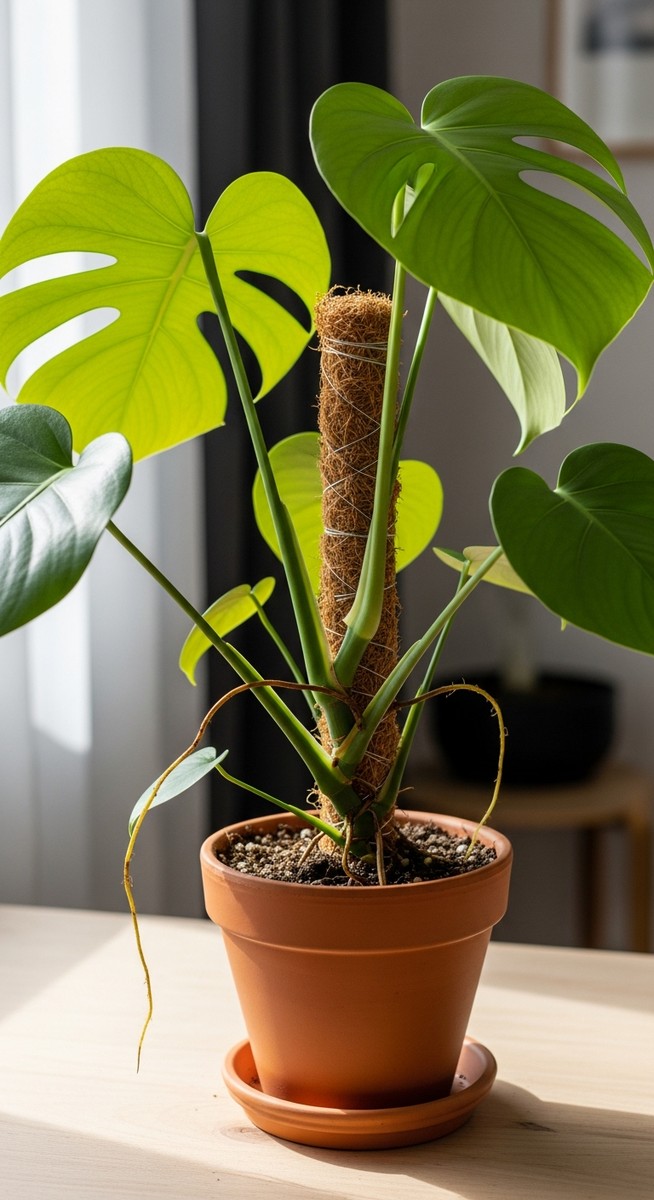
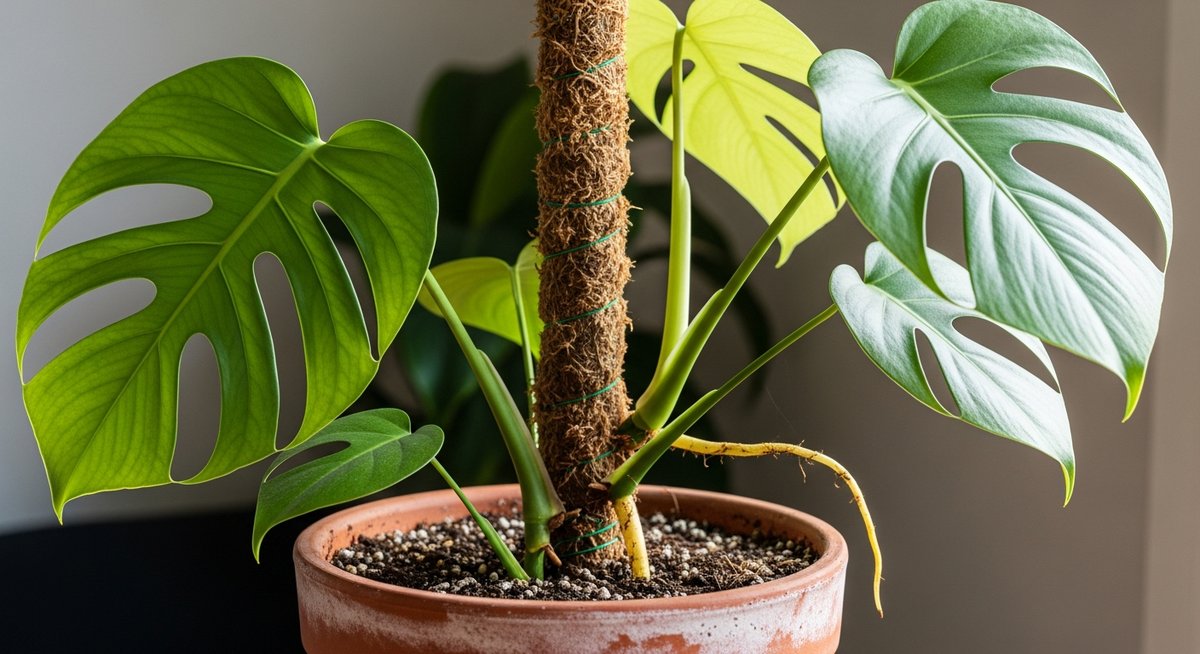
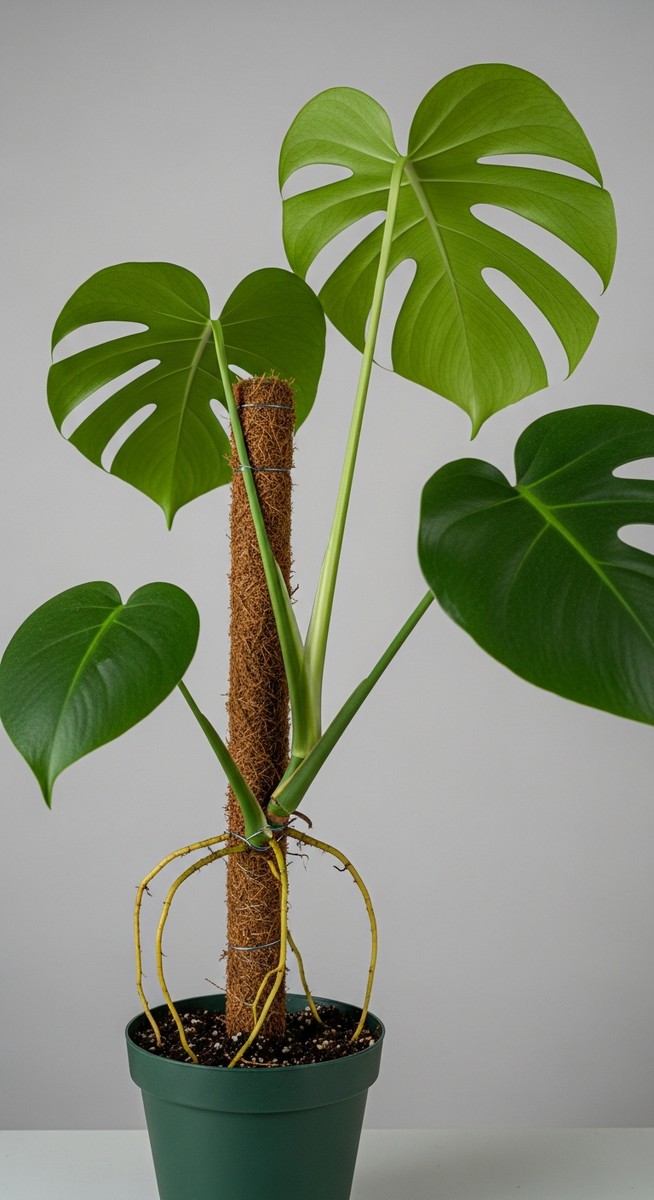
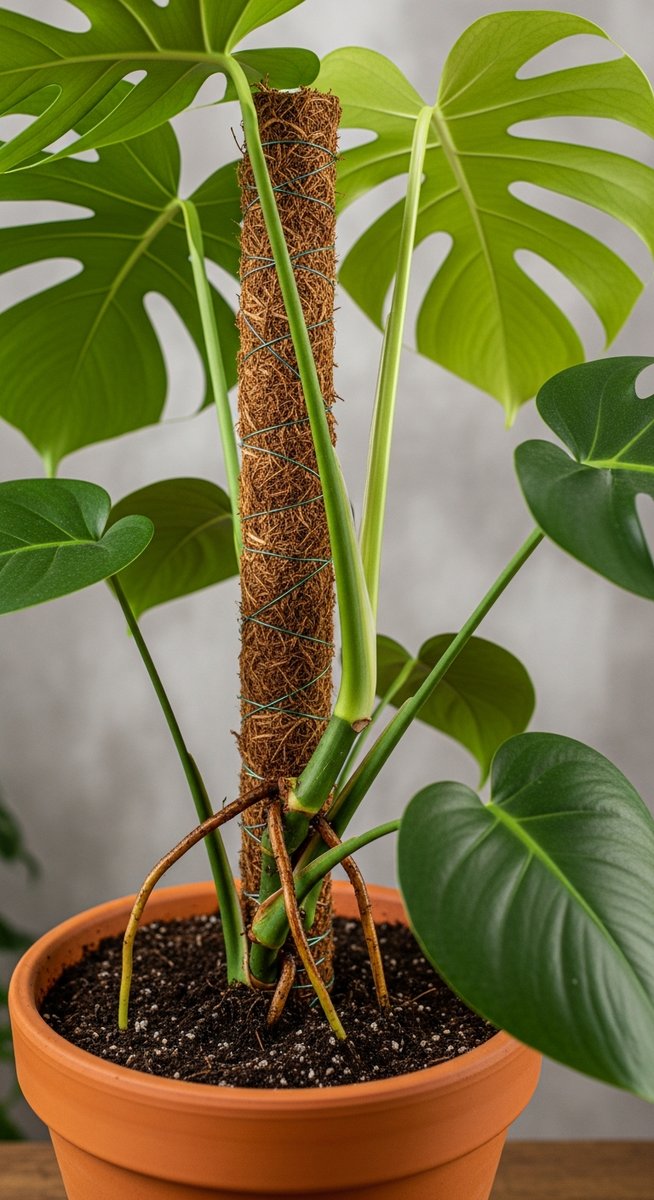
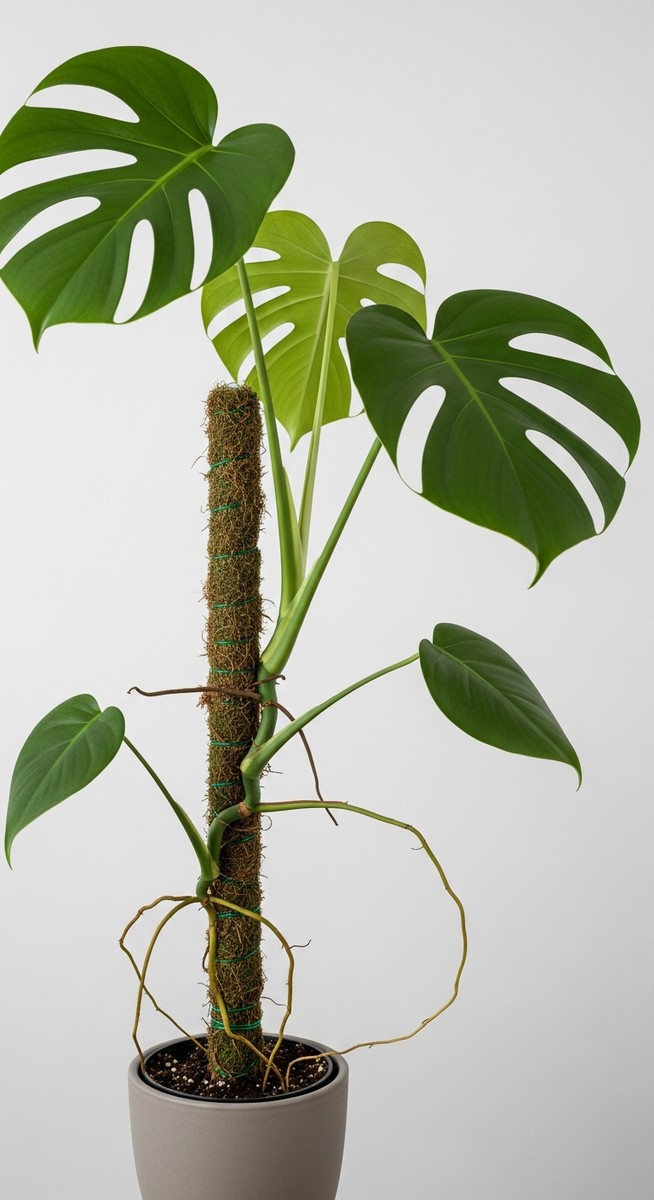
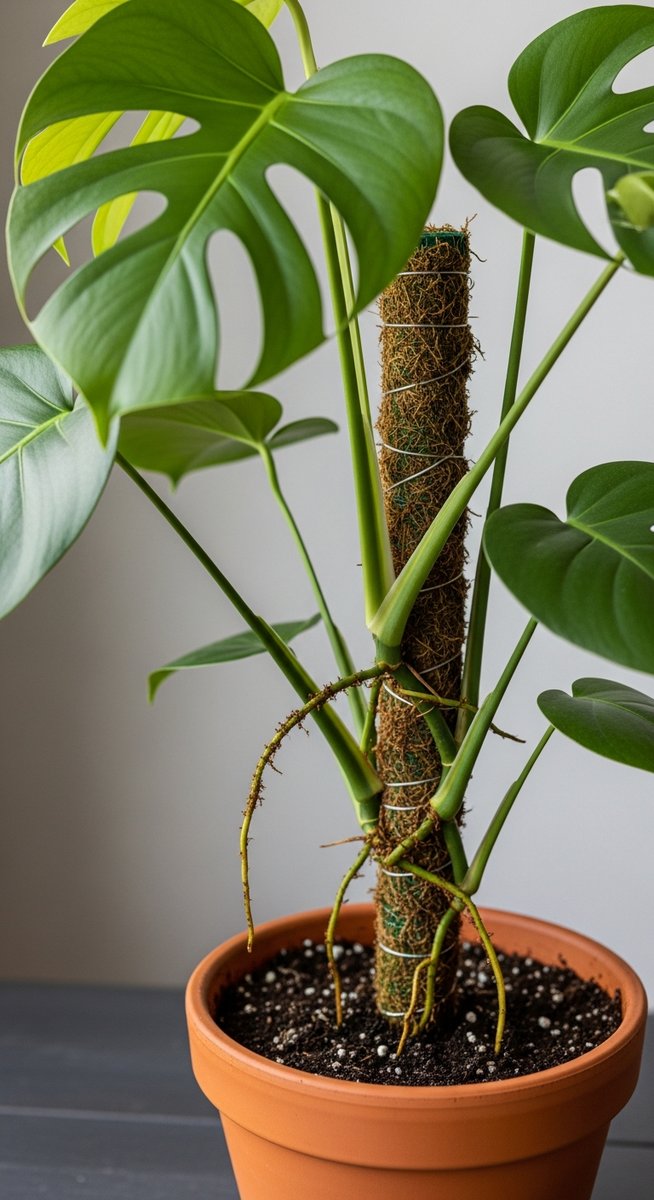
Opinions differ about the best moss pole for a Monstera plant, but they all have one thing in common: A moss pole is covered (or filled) with sphagnum moss that provides a rough surface for the aerial roots of the Monstera plant to cling to.
There are several options for a moss pole for your Swiss Cheese plant.
- A simple stake covered with sphagnum moss and secured in place with fish line or wire. You can make one from a garden stake or a small tree branch.
- A slab of wood covered with moss. You can make this Monstera moss pole from scrap lumber and is typically flat and 3 to 4 inches wide. You can also purchase wood slabs at home improvements centers, plant centers, and craft supply stores.
- A moss filled moss pole. Make these Monstera moss poles with a cylinder of wire or plastic mesh and filled with sphagnum moss. Some of the moss protrudes through the holey surface of the tube giving your Monstera plant plenty of surface for the aerial roots to cling to.
When you see a moss pole for sale, take a moment to consider how it will fit in with your décor, whether it is the correct size for your Monstera plant, and how well you can fit it into the existing plant pot.
FYI: While it is wise to get a moss pole for your Monstera plant that is at least 12 inches taller than the plant, many Monsteras are slow growers. Instead, it’s best to start with a small to moderate sized moss pole and get a larger one when your Monstera plant needs it.
How do you train a Monstera to climb a moss pole?
Monstera plants are natural climbers in the wild, but that doesn’t mean they can’t use a little help from you to get them started.
- Position the moss pole behind the Monstera plant so that the pole is between the main stem of the Monstera plant and the rim of the pot. When repotting your Monstera plant at this time, aim for placing the pole in the center of the pot with the plant slightly to the front. Insert the pole so that it reaches to the bottom of the pot. This helps with stability and prevents the pot from toppling.
- Gently separate the individual vines on your Monstera plant with your hands and stretch them upwards. Be careful not to tug too hard and disrupt the roots of the plant. Position them with your Monstera’s aerial roots facing the moss pole.
- Secure the vine to the moss pole. For this, you can use soft plant ties, pieces of soft fabric like old t-shirt material, or even a strip cut from old pantyhose. The tie should be tight enough to hold the vine in place, but loose enough for the vine to grow.
- Space the plant ties 4 to 6 inches apart along the stem of the plant. Later when the aerial roots take hold you can remove most of the plant ties if you desire.
Should I soak my moss pole?
You should consider soaking your moss pole as, to be most effective, the moss pole needs to be moist. A dry upright pole will provide your Monstera plant with the support it needs if you continue to attach the vines with ties. However, a moist moss pole encourages the aerial roots to grow into the moss to get moisture.
This in turn keeps your Monstera vine growing up the pole and stretching for the ceiling.
How to keep a moss pole moist
Consider these options for keeping your moss pole moist.
- Mist the moss pole with a spray bottle. Use distilled water or let your tap water sit out overnight to rid it of chlorine and other added chemicals. Mist until the moss is moist, but not soggy.
- Pour water onto the top of the pole allowing it to run down the moss. Do this slowly to avoid messy spills.
- Move your Monstera plant to the sink and use the sink sprayer to moisten the moss pole. Tip your Monstera plant to the side and spray the water directly on the moss pole, if practical.
- Check that any excess water from watering the moss pole does not collect in the plant pot. Monsteras are prone to root rot and do not like soggy soil. Empty the saucer or tip your plant to the side and let the pot drain into the sink.
When should I put a moss pole in my Monstera pot?
Ideally, you should erect a moss pole when you pot your Monstera plant after bringing it home from the store. This will get your plant off to a good start and provide it with the support it needs to grow taller. Otherwise, set up a moss pole when you repot your Monstera plant.
You can also put together your moss pole at any time your Monstera begins to droop or needs additional support. Use care not to damage the tender roots if you are putting a moss pole into the pot of an established Monstera plant.
How do I keep my Monstera upright?
The preferred method of keeping your Monstera plant upright is with a moss-covered pole or totem, but it’s not the only option. You can stabilize your Monstera plant with a plant trellis or plant stake, too.
Which you choose to use depends on the size and growth stage of your Monstera. A young Monstera plant will happily grow with a little support from a stake, but as it matures it will need a totem or moss cover pole to help it grow upwards. Otherwise, you may notice your Monstera drooping.
Does my Monstera need a support pole?
Not all Monstera plants need to grow up poles. Some varieties, like Monstera adansonii and Monstera deliciosa, make delightful plants in hanging baskets. The long vines trail over the sides creating a dramatic display.
Consider planting Monstera plants in baskets and placing them on the top of bookcases or other ornate furniture and let them cascade over the edges if you prefer not to use a pole. In fact, that’s exactly how a lot of people choose to display their Monstera adansonii.
But beware, Monstera plants do not typically produce fenestration in the foliage and may not produce variegated leaves if they are not allowed to climb. These plants often remain immature, producing green leaves, until they break through the canopy for sunlight in the wild to get the light your Monstera needs.
Is there a good moss pole alternative for Monstera?
If you prefer not to use a moss pole with your Monstera, alternatives include trellises and plant stakes. The advantage of growing a Monstera on a trellis or plant stake instead of a moss pole is that you don’t need to worry about watering the pole.
Some also think that a Monstera’s moss pole detracts from the beauty of the plant and prefer to use a discrete trellis or to stake their Monstera instead. While your Monstera may need a bit of help from you to keep it going in the right direction, the effort can be worth it.
Use plant ties to attach the vines to your trellis or pole to provide your Monstera plant with the support it needs to climb.
How to make a DIY moss pole
Making a simple moss pole for your Monstera plant isn’t difficult. Consider one of these simple alternatives to buying a moss pole for sale that’s premade for your Monstera plant:
DIY moss covered pole
- Choose a stake that is at least twelve inches taller than your Monstera plant. Don’t forget to add the depth of the pot, too as you will be inserting the stake into the pot so that the end touches the bottom of the pot. This is partly why, when considering the best pot for your Monstera, the depth of the pot is an important thing to keep in mind.
- Cover the stake with sphagnum moss. The aim here is to make a thick layer of moss approximately one inch thick.
- Wrap the moss-covered stake. You should use thin craft wire, florist wire, or monofilament line to secure the moss in place.
DIY moss filled tube
- Cut a section of garden mesh or mesh wire long wide enough to make a cylinder for your moss-filled tube. Start with a 12-inch-wide section and roll it into a tube, overlapping the edges until the tube is the desired size for your pole.
- Secure the mesh together. Ideally, use some florist wire, monofilament line, or twine to hold it in place.
- Fill the tube with sphagnum moss. Make sure you tuck it in snugly.
- Water the tube of moss to moisten it thoroughly before inserting it into the pot.
DIY moss covered slab
If you prefer something a bit wider than the traditional pole, consider using a slab of wood instead. These are particularly attractive for growing Monstera dubia, also known as the shingle plant.
- Select a slab of wood the proper size for your Monstera plant. You can use an old piece of lumber, rough cut wood, or even fallen branches from your property cut into a rough slab. Avoid wood treated with chemicals as this may pose a risk to your Monstera plant.
- Fold the sphagnum moss over the slab of wood. You can cover the front and leave the back bare if you prefer, or you can cover both sides of the wooden slab.
- Tie the moss in place with jute, twine, or florist wire and secure the ends.
While many Monstera lovers prefer to grow them on a moss-covered pole, there are always exceptions. Some people simply don’t want to fuss with watering the pole or don’t find them visually appealing. Others prefer to grow Monsteras like Monstera Adansonii in hanging pots or the delicate Monstera dubia on a wooden slab to show off its clinging leaves.
The trick to growing beautiful Monsteras with lacy and holey foliage is to let the health of the plant be your guide. Provide your specific Monstera with the conditions it needs, and you will enjoy its beauty for years to come.