
Monstera plants are a beauty to behold. Their majestic spade-shaped green leaves in varied styles alleviate the appearance of any space. However, despite its beauty, Monstera root rot is a common problem that kills your plants.
You can treat root rot in Monstera by using fungicides, repotting the plant to healthy soil, improving drainage, and aerating the soil. After doing all this, observe a good watering schedule to prevent overwatering, the leading cause of root rot.
Root rot begins by killing the plant’s roots and progresses up to the main stem after taking hold. The roots change color from white to black and become gooey before dying. Root rot will swiftly kill your Monstera plant if it is not treated.
Because the roots are hidden beneath the soil, root rot is difficult to detect. However, if you pay close attention to other indications that your Monstera is not in good health, you can treat it.
Table of Contents
Easy Monstera Care Guide 🌿
⭐ Want one? Grab a classic Monstera here or a smaller Monstera Adansonii here!
💧 Water: Water when the top 2-3 inches of soil feel dry. Monsteras prefer consistent moisture but don’t like sitting in soggy soil.
🌱 Soil: Use a well-draining potting mix - I personally use this tropical potting mix. A mix with peat, perlite, or coco coir is great for avoiding soggy roots.
☀️ Light: Bright, indirect light is ideal. Direct sunlight can scorch their leaves, while low light may slow growth.
🌡️ Temperature: Monsteras thrive between 65-85°F (18-29°C). Keep them away from drafts and sudden temperature changes.
🌿 Fertilizer: Feed with a balanced, water-soluble fertilizer (my top pick is this Miracle-Gro one) once a month during spring and summer. Skip feeding in fall and winter.
What causes root rot in Monstera?
Root rot is caused by various circumstances related to too much moisture in the soil over an extended period. Plants, like us, require oxygen. Chronic overwatering or, if the soil has already been tainted by fungal root rot, a single instance of overwatering can end up causing root rot.
Excessive moisture causes root rot, a fungal infection in the soil. An anaerobic condition is created when too much wetness is in the soil for too long. Such a condition causes the roots of your Monstera to deteriorate and decompose.
Here are some of the reasons that may lead to root rot in Monstera :
1. Growing Monstera inside a big pot
When you grow your Monstera in a large pot, there are soil regions where there are no root hairs to take up moisture since the pot is too large for the Monstera.
Because there are no roots in those soil locations, the soil will remain moist for an extended length of time until the water evaporates or drains naturally. If the water takes an excessive time to evaporate, the soil will retain most of the water, causing the roots to rot.
Take a look at our article for some tips on choosing the best pot for your Monstera.
2. Using a pot with little or no drainage holes
Yet another possibility that could cause root rot in Monstera is planting your crop in a drainage-less pot. When there is no way for the excess water to drain from the soil, it sticks around. The dampness may cause Monstera root rot.
3. The soil contains too much organic matter or clay
Clay is a sticky soil that gets compact when wet, thus holding water longer. So much so, when you plant your Monstera in this soil, the roots are wet most of the time. The water will not be draining as fast as it should, causing your Monstera root to rot.
Too much organic matter has the same effect as clay soil as it gets compact when wet.

Miracle-Gro Tropical Potting Mix
⭐⭐⭐⭐⭐
The best soil for Monstera plants, specially made for tropical greenery. Packed with nutrients and lava rock for great drainage, it keeps your Monstera healthy and thriving
4. Watering too often
Overwatering your Monstera is one of the obvious reasons that may cause Monstera root rot.
When you have a watering schedule that overrides the rate at which the soil drains, it may cause Monstera root rot. The topsoil layer must be dry before watering your plant again, as a general rule of thumb.
5. Fungal infection in the soil
Root rot is caused by various fungi, including Rhizoctonia, Pythium, and Fusarium. If these fungi are already present in your Monstera’s soil, overwatering is more likely to result in root rot.
Microbes from these fungi are transmitted through the air by insects. If you have fungal root rot on one of your potted plants, the fungus has most certainly spread to other soil containers in your residence. The fungi will thrive if the soil becomes soggy and causes severe damage.
6. Over-fertilizing
Plant roots must exert force to draw moisture from the ground, and excessive fertilization of your Monstera causes roots to shrink, making it more difficult to draw water from the surrounding soil. High nitrogen fertilization causes roots to shrink, making it more difficult to draw water from the surrounding soil.
As a result, if this continues for an extended period, the water you are providing for the plant will not be absorbed. Consequently, the Monstera’s roots are exposed to moisture for a longer period than necessary, encouraging root rot.
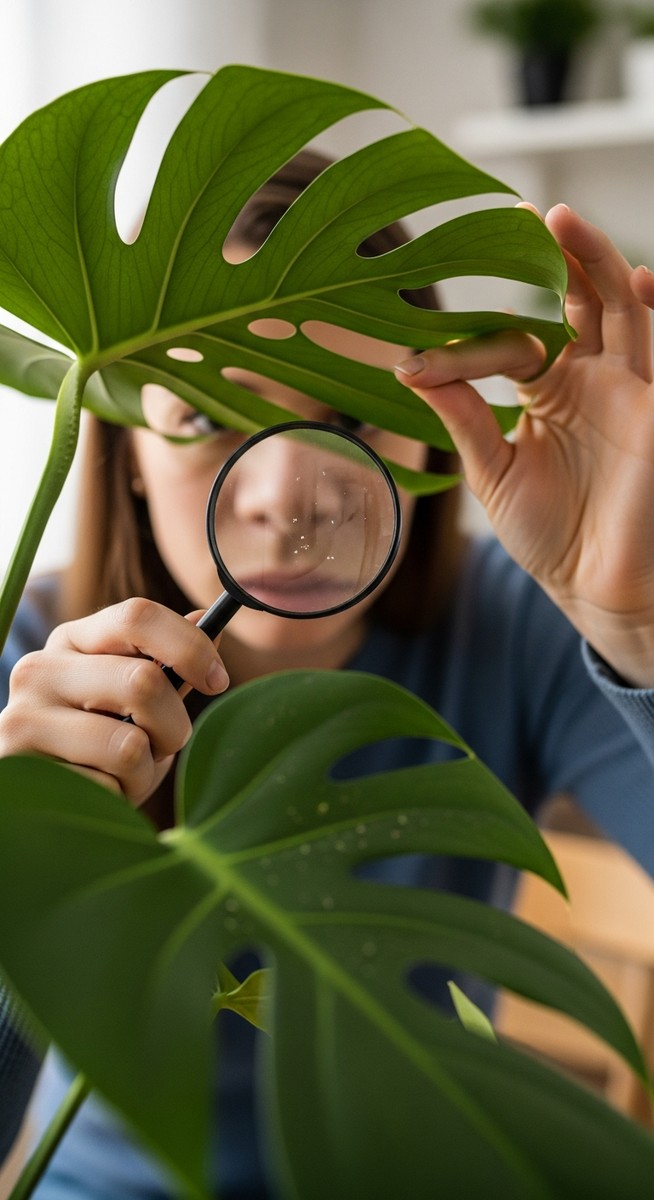
How do I know if my Monstera has root rot?
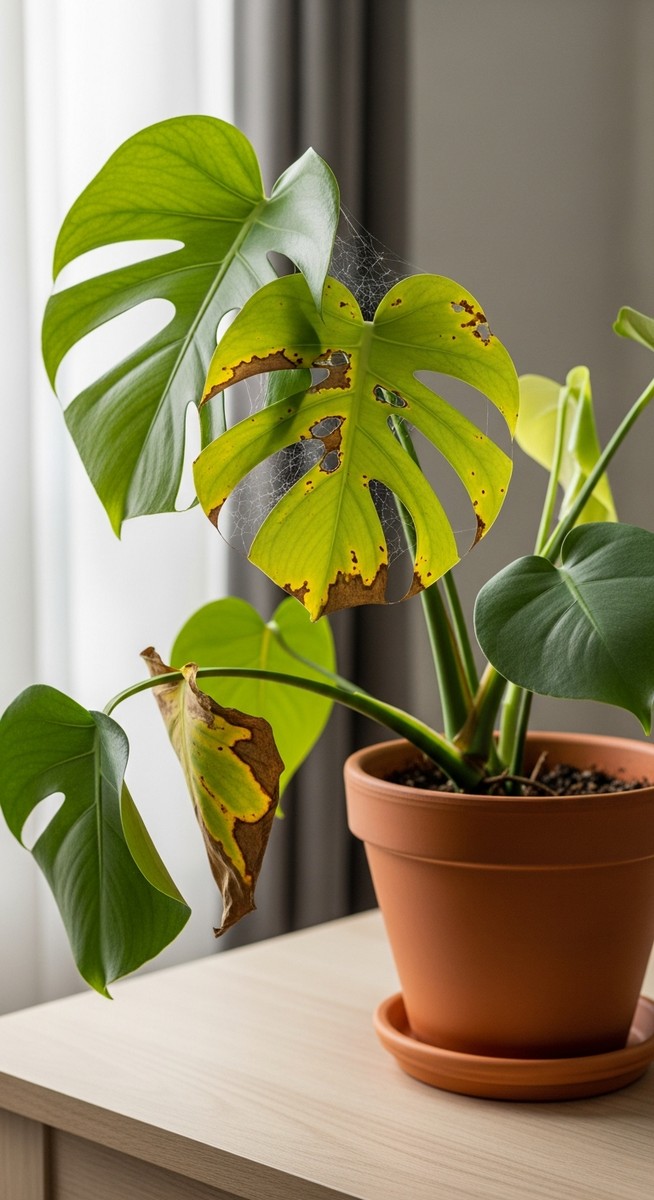
Some early warning indicators of your Monstera having root rot include wilting or yellowing leaves and slow growth. More advanced root rot can see foul-smelling, discolored or dead roots; thin, dark or mushy stems; and leaves with black spots. The best strategy is to directly check your Monstera’s roots.
As previously said, determining whether or not your Monstera has root rot is not a straightforward process. Unless you have a clear view of the roots, which an owner rarely has, you will have trouble confirming it by just looking at the crop in the early stages.
The early warning symptoms of Monstera root rot could indicate various problems with your Monstera, but root rot is the most common. You can save your Monstera from root rot when you notice these signs and act accordingly so as to treat your Monstera root rot quickly.
When the more advanced symptoms appear, you have a chance of saving your Monstera, but it’s unfortunately not guaranteed. In fact, it’s often better to simply dispose of the plant if it’s too far gone to avoid the infection in the roots spreading to your other houseplants.
Keep reading for some more details on what Monstera root rot looks like.
1. Wilted leaves
Wilted leaves suggest that the soil is not providing enough water to your Monstera. Check the ground of your Monstera to see whether it is wet or dry if it is withering away. Your Monstera may just be thirsty if the moisture level is low, so it’s ideal if you give it a good, substantial drink of water.
If the ground is already slightly damp and your Monstera leaves are drooping, the roots have most likely been damaged by rot. So, they are incapable of absorbing the water that has already been applied. At this juncture, you should thoroughly check the roots of your Monstera for rot.
2. Stagnant development
Stagnant growth implies that your Monstera isn’t developing as quickly as it should. This is common throughout the winter months when the temperatures drop and the days become shorter. When Monsteras don’t get sufficient light, fertilizer, or moisture, their growth slows down.
Regardless, a lack of new growth on your Monstera doesn’t always indicate that its roots are rotting. A slow-growing plant, such as a Monstera, will require less water, and too much moisture during stalled growth can induce root rot.
3. Yellowing leaves
Root rot and overwatering are two common causes of yellow Monstera foliage. If your Monstera is still sitting in damp soil, the next stage after dangling leaves is yellowing leaves.
If the leaves on your Monstera have turned yellow, you should inspect the soil and root systems for excess water and rot.
4. Foul-smelling roots
If you smell the soil of your Monstera plant and it stinks like something is decaying, it’s most likely your Monstera’s roots.
The harsher the odor, the more infected your Monstera is, and the more difficult it will be to keep it living at this stage.
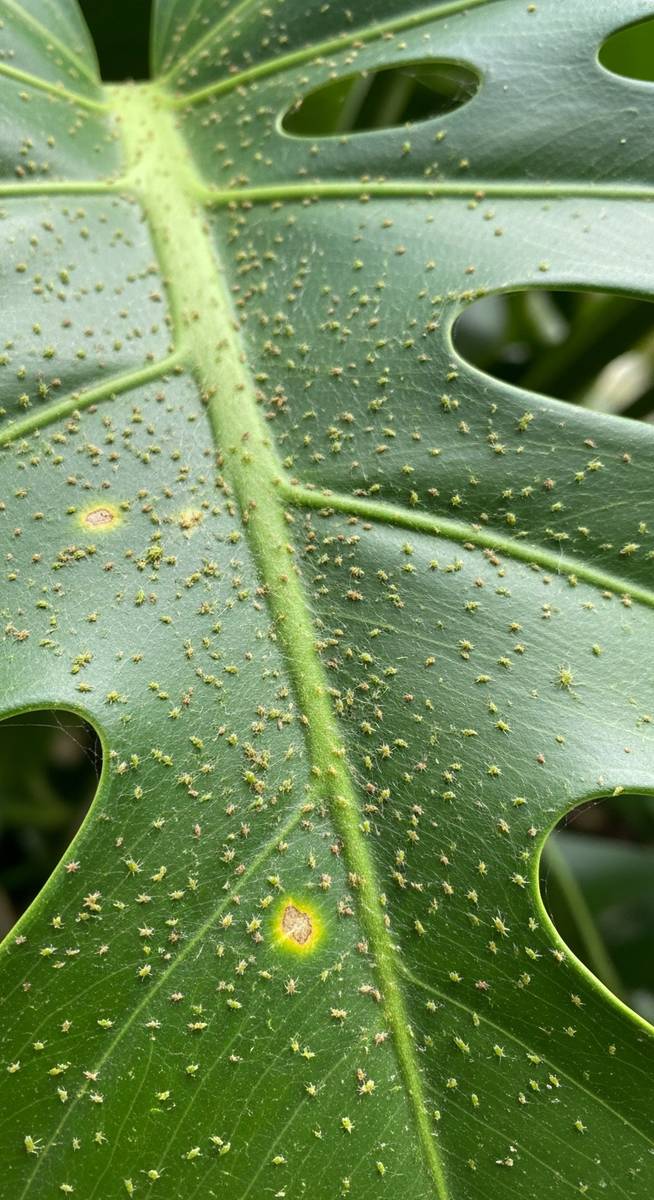
5. Leaves with black spots
On the foliage of your root rot Monstera, black spots will appear, occasionally followed by yellowing bordering the lesion. Black spots are a sign that the fungus has spread across the entire plant.
Root rot will ultimately spread throughout the plant, from the roots to the stem and the leaves. The presence of black or brown patches on the leaves indicates that the process is in its last stages.
6. Discoloration of the roots
Like other plants, the roots of your Monstera should be whitish. Root rot causes the rotting roots to turn dark or black and become slippery and squishy. The discoloration is only visible if you burrow into the soil or remove your Monstera from its pot to examine the roots.
All the black and damaged roots must be cut out while treating your Monstera’s root rot. If you do not do this, the disease will spread.
7. Thinning of the stems
When the twigs and stalks of your Monstera appear brown, thin, or strange, the fungal disease has likely progressed to an advanced level. At this stage, the plant may be irreparably damaged. Due to overwatering and overfertilization, the crop may have been under stress for a long time without being noticed.
Monsteras may live with very little maintenance, but too much of something can cause various issues, including root rot.
8. Dark and mushy stems
When the rot spreads to the central stalk of your Monstera, it will turn black and squishy, just like the roots. The Monstera will perish shortly since the decaying stem cannot transmit nutrients and water to the foliage.
9. All of the roots have died
When all of your Monstera’s root hairs have died, it’s unlikely to survive. Roots are an essential part of every plant’s existence. Your Monstera won’t be able to take in any moisture and nutrients if it doesn’t have roots, and it will most likely die from dehydration.
So with dead roots, the Monstera root rot is beyond repair.
Signs of root rot vs. healthy roots
The first obvious sign of root rot is the color of the roots. A healthy root will have a white or creamy hue, and a Monstera root rot is brown or black. The second indication is the texture of the root surface. Healthy roots will not have a slimy texture evident with root rot.
Thirdly, the feel of the root when you press may help you differentiate between a healthy and rotting root. Healthy Monstera roots will be firm since the plant cells are healthily turgid, moving water and nutrients to other plant parts. Unhealthy rotting roots will feel squishy and probably burst since the cells are dead or dying.
Lastly, healthy roots have no foul smell that a rotting root will have.
How do you fix root rot in Monstera?
To treat Monstera root rot, you need to act quickly before the disease spreads throughout the plant. This includes removing the infected roots, repotting the Monstera, placing it somewhere to dry out and modifying your watering schedule to not repeat the problem.
The only way to be certain that your Monstera plant has Monstera root rot is to take it out of the pot and examine it. When you do so, look for indicators of infection such as rotten, black, slimy or foul-smelling roots to determine whether or not they are diseased.
Following identifying the symptoms and confirmation that the problem is really Monstera root rot, the following are some of the procedures you can take to repair root rot in Monstera.
1. Rinse the roots first
First and foremost, after removing the pot, you must remove all of the contaminated dirt from the plant because root rot is a fungus that lives in the plant’s root tissues and the soil. Remove your Monstera from its pot and use your hands to brush away as much soil as you can from the plant’s roots.
Some roots will quickly slip out of the soil with the dirt if the rot is severe. Once you have completed this procedure, you will be able to observe the entire extent of the Monstera root rot.
You must remove all of the contaminated dirt from the area before continuing. Following your gentle brushing away from the muck, rinse your hands and the remaining roots well with fresh water.
2. Remove the infected roots
After you’ve removed all of the soil, you’ll need to remove any dead or dying roots from the plant. To avoid spreading the fungal illness to healthy roots, you must use caution when cutting down the infected roots. It would help if you used a sharp, sterile knife or scissors for this stage.
In between each incision, disinfect your pruners by dipping them in diluted bleach or rubbing alcohol. Remove as much unhealthy tissue from your plant as possible with a sharp, sterile knife.
3. Allow the roots to air dry before repotting
Allowing the roots to dry out before repotting can help decrease the possibility of still rotting present on the roots. You can also sterilize the roots that have survived by soaking them in diluted hydrogen peroxide solution. Treat Monstera root rot with hydrogen peroxide by adding one tablespoon of peroxide per cup of water should be sufficient.
While the roots are drying, prepare the pot and the new dirt for planting. You can use peroxide or mild bleach to fully disinfect the pot and any supports. Then remove all the old, filthy dirt and dispose of it appropriately.
4. Repot the plant in new soil
Once the plant’s robust roots have become sufficiently calloused, it is necessary to repot your Monstera.
Use a fresh, new soil mix for your Monstera if you want it to grow healthily. If you use old, infected soil on your plant, it will suffer from more root rot. The fungus is still present in that particular soil.
Ensure that you improve the drainage in your potting soil by mixing additional perlite, fine gravel, or sand into the soil mix. Improved soil drainage will assist your Monstera in avoiding root rot later on in its growing season.
FYI: My personal favorite soil for Monstera plants is the Premium Monstera Potting Soil (you can check the latest price here).
5. Prune the leaves that have been harmed
When pruning your Monstera’s roots, it’s good to prune back 1/3 to 1/2 of the leaves simultaneously. With fewer roots, the plant won’t be able to support as much foliage, and the leaves will begin to droop. You can see how to prune your Monstera here.
Cutting down leaves that have been infected by root rot will aid in the recovery of your Monstera plant.
6. Place your Monstera in indirect, bright sunshine
Monsteras need light that’s bright and indirect, as this is the perfect amount for them. When they don’t get enough light, plants don’t take up as much moisture as they should, becoming more susceptible to root rot. In addition to keeping your Monstera from decaying, direct sunlight will help it grow substantially taller, larger, and healthier.
For example, the finest indoor locations are next to an east-facing window in your home. A shady nook with plenty of brilliant indirect light will be ideal if the location is outdoors. A sufficient amount of sunlight allows the plants to heal more quickly and allows for photosynthesis, which ensures that the crop uses the moisture in the soil to grow.
Because of the warm temperature, surplus moisture in the soil will evaporate more quickly from the soil.
7. Propagate new Monstera from healthy cuttings
It would not be possible to repot your Monstera plant normally if you discover that it has no viable roots left after substantially reducing the root system. At this point, you’ll need to aid it in regrowing roots by propagating stem cuttings from the plant.
Remove all decaying components of the plant, starting with the roots, stems, and leaves of your Monstera.
Can Monstera recover from root rot?
If the root rot in your Monstera is not too advanced and you notice and act on it quickly enough, your Monstera can recover from root rot. This does, however, largely depend on whether there are enough healthy roots and stems remaining once you remove the infected parts to allow the plant to survive.
Supposing the degree of the root rot is not severe, your Monstera will certainly be able to recover from the root rot.
Listed below are several indicators of whether or not your Monstera will survive root rot.
If you detect the early signs and solve them
In the spring, if you see that your Monstera leaves are turning yellow and drooping and that the plant’s development is stalled, you might be able to salvage it. When this occurs, you can reduce the amount of watering you use, prune the yellowing and wilting leaves, and keep an eye on the crop.
If you see that even a young leaf is yellowing prematurely, you may want to consider removing the plant from its container and examining its root system of the plant.
On closer inspection, if any of the roots are diseased, they should be removed. Then treat the healthy ones with appropriate fungicides to eliminate any fungi that may have survived the process.
In a new soil mix, transplant the healthy plant into a new location and water gently only when the soil is dry.
If there is new growth after repotting
If your Monstera shows indications of prospering after repotting, it has a good chance of surviving root rot. If the new roots are healthy, they supply the plant with nutrients and water to stimulate new foliage’s growth, which is a good indicator.
Conversely, if you detect no development after a few weeks, the problem may still be with the roots. At this time, you should prune the healthy stems and try to propagate them as fast as possible. You have the option of using either water or soil propagation.
If you maintain a healthy watering routine
Because overwatering is the most common cause of Monstera root rot, maintaining a healthy watering plan will surely treat Monstera root rot (and prevent it from happening again).
How do you fix root rot in your Monstera without repotting?
There are three main ways that you can fix Monstera root rot without repotting:
- By early detection
- By propagation
- By applying fungicides.
1. By early detection
When you discover that something is wrong with your Monstera and can confirm that root rot is the source of the problem, you can take action right away.
You do this to reduce watering as soon as possible and see how the plant responds. If the degree of root rot was only beginning to manifest itself, you might still be able to rescue your crop. However, if it is beyond repair, potting may be required.
2. By propagation
The other way to fix Monstera root rot without repotting is by propagating your Monstera. So, do you still have any stem portions with leaf nodes left? If this is the case, congratulations! You can save your plant!
It can be propagated in two ways: by propagating Monstera cuttings in water and by planting them in a new soil mix.
If you choose to go with aquatic propagation, put the Monstera stalk in a container of clean water. To keep the water clean, refresh it every few days. Once you notice some root development, plant the new growth in a fresh soil mix.
Suppose you choose to go with propagating directly to the soil; simply follow the steps above to reproduce them in the ground. In both cases, avoid exposing the newborn Monstera to direct sunlight until it has established roots.
3. By applying fungicides
Once again, this approach will only be effective if used in conjunction with early detection. So much so that if you discover the first slight signs of root rot, you can treat it with the necessary fungicides as soon as you notice them.
Continue reading to learn more about the application of fungicides in the following section.
How to prevent Monstera from having root rot?
Prevention is always better than cure, so if you have healthy Monsteras, here are some of the ways that you can use to prevent Monstera root rot:
- By treating healthy roots with fungicides.
- By repotting in healthy fungus-free soil.
- By improving drainage.
- By aerating the soil.
- By having a good watering schedule.
1. By treating healthy roots with fungicides
It’s good practice to use natural fungicides before repotting the healthy root system plus the foliage.
Some of the natural fungicides you can use are:
- Cinnamon
- Hydrogen peroxide
- Neem oil.
- Apple cider vinegar.
- Baking soda
Which natural fungicides will treat Monstera root rot?
1. Cinnamon
Cinnamon is both a fungicide and a root agent in nature.
So dust cinnamon on the freshly cut roots of your Monstera to cure it for root rot. Cinnamon will aid in the prevention of rot in healthy cells and will encourage new root development.
2. Hydrogen peroxide
Hydrogen peroxide is a potent disinfectant and cleaning agent that you can use to get rid of root rot when dissolved in water.
To cure Monstera root rot with hydrogen peroxide, combine one tablespoon of 3% strength peroxide with one cup of water. You can apply it directly to the roots after trimming. You may alternatively use it as an additional oxidation treatment while watering.
Hydrogen peroxide’s extra oxygen molecule instantly combats the anaerobic environment where root rot flourishes.
3. Neem oil
Fungal and insect problems in your Monstera can be effectively treated with neem oil. As a soil application, neem oil can help prevent fungus root rot.
One liter of neem oil plus 1 liter of water is ideal. To combine the concoction, add a few drops of liquid detergent and stir thoroughly. After hydrating your Monstera, apply this solution to the soil.
4. Apple cider vinegar
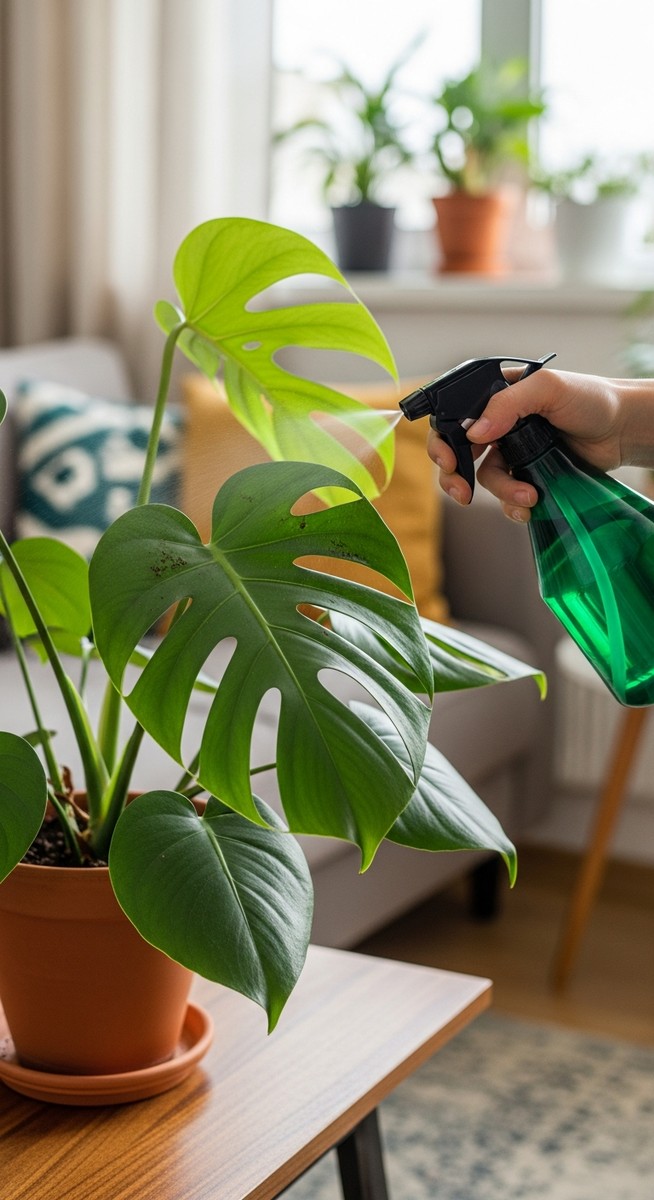
Apple cider vinegar can also treat black fungal root fester in Monstera. ACV should be mixed with one gallon of water and sprayed on your Monstera’s foliage, stalk, and soil.
5. Baking soda
Baking soda is a salt, and too much is bad for your Monstera. So, don’t use too much of it too often.
Combine three tablespoons of this powder into a gallon of lukewarm water as a fungicide. In the late afternoon, squirt it into the soil and stalks of your Monstera to try and help avoid a fungal root rot infestation.
2. By repotting in healthy fungus-free soil
It is critical to repot the healthy root and Monstera leaf in fungus-free soil as soon as possible. It reduces the possibility of the fungus spreading to the fresh crop.
3. By improving drainage
Drain openings are required for your Monstera’s pot for it to function. There is no way around it. Unfortunately, most of the most appealing pots do not have drain holes in the bottom, which is a shame.
To fix this problem, you can either drill a drain aperture into the beautiful pot or use a plain plastic pot with drainage built into it to replace the beautiful one.
4. By aerating the soil
Your Monstera’s soil has to be well ventilated and have adequate drainage.
Adding perlite, gravel, or coarse sand to your Monstera’s potting mix during repotting can allow more oxygen to reach the roots of your Monstera. As a bonus, it makes it possible for water to drain more smoothly through the soil medium.
5. Having a good watering schedule
Even though your Monstera has adequate drainage and aerated soil, it may become wet if you water it excessively.
Your Monstera may require more frequent hydration throughout the winter if it does not receive as much sunlight or if its growth is slowed during this time of year.
See here for exactly how often to water your Monstera to keep your plant healthy going forward.
You can check the soil before watering to see whether or not your Monstera is ready to be hydrated. Your watering plan should always be treated as a guide, and you should make adjustments as needed to meet the individual needs of your Monstera plant.
To determine the hydration of the soil, insert your finger directly into the upper soil layer and pull it out. You can water your Monstera when the top 5-6 cm of the soil is completely dry.
Taking good care of your Monstera is essential since it will keep it safe from root rot and other problems.