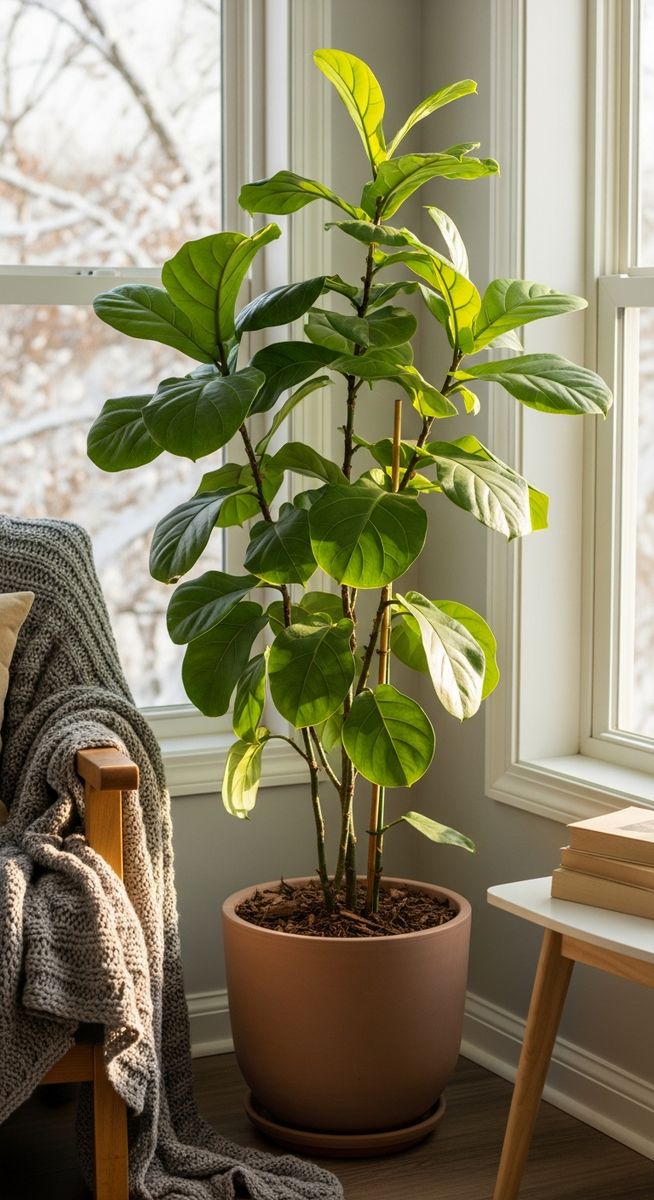
Houseplant care in winter can be tricky, especially with less sunlight and colder temperatures. Your plants might not grow as quickly, but that doesn’t mean they’re not still working hard.
So, how do you make sure they stay healthy during these colder months? A few simple changes can help keep your plants happy all winter long.
Table of Contents
Quick Care Guide for Most Common Houseplants 💚
⭐ How to start? Easy, hard-to-kill plants like Monstera or Pothos are usually a great starting point.
💧 Water: Water when the top 1-2 inches of soil are dry, but avoid letting them sit in standing water to prevent root rot.
🌱 Soil: Use a well-draining potting mix designed for indoor plants - I personally use this one. A mix with peat, perlite, or coco coir is great for avoiding soggy roots.
☀️ Light: Most houseplants thrive in bright, indirect light. Too little light can cause leaf drop, while direct sun may scorch the leaves.
🌡️ Temperature: Keep them between 60-75°F (15-24°C) and away from drafts, heaters or air conditioners.
🌿 Fertilizer: Feed with a balanced, water-soluble fertilizer (my top pick is this Miracle-Gro one) once a month during spring and summer. Hold off during fall and winter.
Understanding Winter Challenges for Houseplants
Houseplants face unique challenges in winter such as reduced natural light, fluctuating temperatures, and a tendency to enter dormant growth periods. These factors require adjustments in care to help your plants thrive during the colder months.
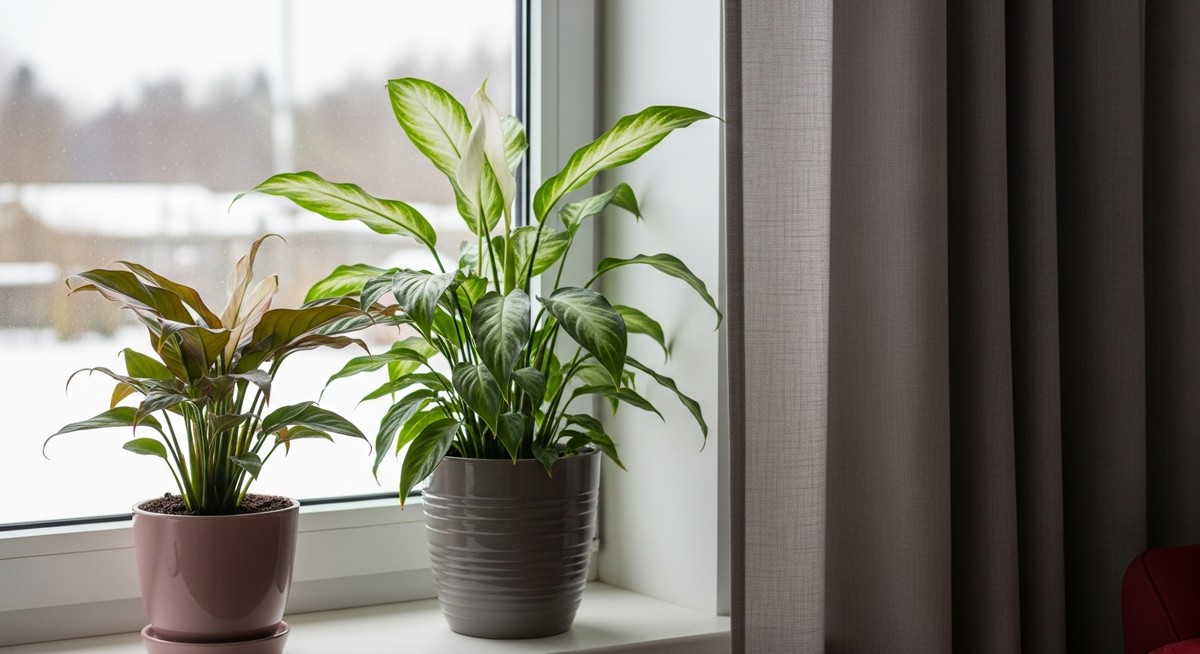
Lower Light Levels
During winter, daylight hours are shorter, and the sun isn’t as strong. This means your plants might not get the light they need.
You can help by moving them to brighter spots like south-facing windows. If natural light is scarce, consider using grow lights to supplement their needs.
Rotate your plants regularly to ensure they receive even light exposure. Dust on leaves can block sunlight, so keep them clean to maximize light absorption. Consistent light exposure helps maintain healthy growth, even in the duller winter months.
Temperature Fluctuations
Temperature swings are common in winter, and houseplants are sensitive to these changes.
Avoid placing your plants near drafts, heaters, or windows that are opened frequently. Sudden changes in temperature can stress plants, causing them to drop leaves or stop growing.
Keep your home’s temperature consistent, ideally between 65-75°F. Use thermometers to monitor temperatures around your plants. If your plants rest in cooler spots at night, ensure it doesn’t drop below their tolerance levels.
Basically, a good rule of thumb at any time of the year is that protecting your plants from extreme conditions will promote steady, healthy growth.
Dormant Growth Periods
In winter, many houseplants enter a dormant phase, slowing growth. This is a natural survival strategy.
Reduce watering and feeding during this time, as they’re not actively growing. Overwatering in dormancy can lead to root rot.
Be mindful of your plant’s specific needs, as some may need more or less care during dormancy. Adjust your routines, and let the topsoil dry out before watering again.
By supporting your plants in their dormant phase, you’ll encourage a strong resurgence in spring.
Adjusting Watering Routines for Houseplants in Winter
Winter brings changes that affect how you should water your indoor plants due to cooler temperatures and less sunlight. Understanding soil moisture, changing how often you water, and using water at the right temperature are key to keeping your plants healthy through the winter months.
Evaluating Soil Moisture
In winter, it’s important to check the soil’s moisture level regularly. As temperatures drop, plants use less water.
Insert your finger about two inches into the soil to feel if it’s dry. If the soil is still moist, hold off on watering.
Using a moisture meter can give more precise readings and help prevent overwatering, which is a common issue during winter, but you should be fine by using the “finger method” too.
It’s easy to assume that indoor plants need the same water in winter as in summer, but conditions are very different. The lack of active growth often means less frequent watering is necessary. On the whole, assess each plant’s moisture needs separately.
Watering Frequency Changes
As plants enter dormancy, they don’t need as much water. You might find that your plants require watering once every two weeks instead of weekly.
Monitor them closely since their needs can vary based on sunlight levels and indoor humidity. Look for signs of overwatering like yellowing leaves or a musty smell from the soil.
List of Signs Indicating Overwatering:
- Yellowing leaves
- Soft, mushy stems
- Musty smell from soil
Consider the type of plant, as succulents and cacti may require even less water. Others, like ferns or peace lilies, may need a bit more attention to maintain their health.
Using Room Temperature Water
Cold water can shock a plant’s roots, especially during colder months.
It’s best to use water at room temperature to avoid stressing your plants. Fill your watering can and leave the water out for a few hours before using it. This practice also allows chlorine in tap water to evaporate, which is beneficial for sensitive species.
Room temperature water is particularly important for tropical plants, which are more sensitive to dramatic changes. Simplify this process by keeping a watering can full of water ready at room temperature, so it’s always available when needed.
Optimizing Winter Humidity for Indoor Plants
Winter often brings lower humidity levels, which can be challenging for indoor plants accustomed to more humid conditions. To combat this, you’ll want to focus on raising humidity indoors through several effective methods, such as humidity trays, plant groupings, and humidifiers.
Creating Humidity Trays
Humidity trays are a simple way to increase moisture around your plants. You’ll need a shallow tray, some small stones or pebbles, and water.
Place the stones in the tray and add water until it just touches the top of the stones. Put your plant pots on top of this setup.
This allows water to evaporate, adding moisture to the surrounding air. Make sure the pots are on top of the stones and aren’t sitting directly in the water, which can lead to root rot. Check the water level regularly and refill as needed to maintain consistent humidity.
Grouping Plants for Humidity
Grouping plants together can naturally increase humidity. As plants release moisture through transpiration, this moisture benefits other plants nearby.
This collective humidity effect provides a natural boost, especially in dryer winter conditions.
Arrange your plants in clusters, but ensure they’re not overcrowded, which can limit air circulation and lead to mold growth.
It’s helpful to combine different plant sizes and types to make the setup visually appealing and effective. This method works well in rooms where space allows for larger plant arrangements.
Using Humidifiers
Humidifiers offer a more controlled way to manage humidity levels in your home. Choose a model that’s easy to maintain and has an appropriate output for your space.
Position it near your plants, but not too close, as direct moisture can cause leaf problems.
Regularly clean and refill your humidifier to prevent bacteria or mold buildup. Monitor room humidity with a hygrometer to keep levels between 40-60%, ideal for most houseplants.
A balanced approach can significantly enhance your indoor environment, benefiting both plants and people during the winter months.
Temperature Management
During winter, it’s crucial to maintain suitable temperatures for houseplants, keeping them safe from cold drafts and preventing damage from heat sources. Attention to these elements can ensure plants remain healthy and vibrant through the colder months.
Ideal Temperature Ranges
Most common houseplants thrive in temperatures between 65°F and 75°F (18°C to 24°C) during the day. At night, try to maintain a range of 55°F to 65°F (13°C to 18°C).
Sudden changes can stress plants, so aim for consistency. Use a thermometer to monitor the room temperature and adjust as needed.
If your home gets too cold at night, consider relocating plants to a warmer spot or using a space heater at a safe distance.
Protecting from Cold Drafts
Cold drafts can be harmful, so keep plants away from windows and doors where cold air might seep through.
If your plants are on a window sill, try moving them slightly away or using a sheer curtain to block the chill without depriving them of light.
Foam insulation strips or draft guards can be used at doors and windows to plug gaps. If you need extra protection, consider using a room thermometer near your plants to ensure the surrounding temperature remains consistent.
Avoiding Heat Sources
While cold is a concern, heat sources like radiators, heaters, and fireplaces pose a risk too.
Direct heat exposure can dehydrate plants and cause leaves to scorch.
Place plants at a safe distance from heaters—ideally a few feet away.
If you use a humidifier, place it near plants to counteract dry air from heating systems. Monitor leaf edges for browning, which can indicate excess heat or dryness. Adjust positioning and humidity levels accordingly to keep the environment ideal for your plants.
Light Requirements and Supplemental Lighting
In winter, houseplants need special attention to ensure they get enough light. You might need to adjust their natural light exposure, use artificial lighting, and consider how long to provide light each day.
Natural Light Adjustments
During winter, daylight hours are shorter, which means less natural light for your plants.
Try moving them to south or west-facing windows where they can receive maximum sunlight. Make sure to clean windows thoroughly, as any dirt or smudges can block precious light.
You can also rotate plants every few days to ensure each side gets equal light.
Be cautious about drafts from windows, as cold air can harm your plants. Using sheer curtains can help diffuse the light and prevent any leaves from burning, especially on sunny days.
Using Grow Lights
Sometimes, natural light isn’t enough. That’s when grow lights come in handy.
There are several types like LED, fluorescent, and incandescent.
LED grow lights are energy-efficient and release very little heat, making them safe for indoor plants.
Fluorescent lights are another good option, typically providing a full spectrum of light.
Position grow lights about 6-12 inches above plants for optimal coverage. Adjust the height as your plants grow to maintain effective lighting. Remember, longer periods of artificial light can simulate a natural day.
Light Duration in Winter
With the reduced daylight, you’ll need to adjust light duration for your houseplants.
A general rule is to provide 12-16 hours of light daily. This compensates for the shorter days of winter and helps maintain plant health.
Timers can be a useful tool to automate this process, ensuring plants receive consistent lighting.
Keep in mind that different plants have varying light needs. Some may need extra hours, while others thrive with less.
Observe your plants for signs of too much or too little light, such as leaf drop or stretching. Adjust accordingly to keep them healthy.
Fertilizing Houseplants During Winter
In winter, houseplants require less feeding due to reduced growth.
By adjusting the fertilizing schedule, selecting the appropriate nutrient mix, and recognizing plant dormancy, you can keep your plants healthy and thriving through the colder months.
Fertilizing Schedule Adjustments
During winter, the majority of houseplants experience slower growth. This means they don’t need as much fertilizer as they do in the growing seasons.
It’s a good idea to reduce feeding to once every 6-8 weeks, or even stop altogether, depending on the plant.
Be observant of your plant’s condition and adjust accordingly.
Certain species like the Christmas cactus or poinsettias might still need regular feeding if they bloom in winter.
Keep an eye on these flowering plants to ensure they receive enough nutrients.
If you’re unsure, err on the side of under-fertilizing, as too much fertilizer can harm your plants.
Selecting the Right Fertilizer
Choosing the right fertilizer is crucial in winter. Typically, it’s best to use a balanced, water-soluble fertilizer with a ratio such as 10-10-10.
These balanced formulations ensure that plants receive equal amounts of essential nutrients like nitrogen, phosphorus, and potassium, which are important for maintaining their health during dormant periods.
That said, it’s worth double checking for your specific plant, as some do prefer a slightly different balance.
Whichever ratio you end up choosing, organic fertilizers can be beneficial since they release nutrients slowly and naturally. Consider a liquid seaweed or fish emulsion for gentle feeding.
Always follow the label instructions for dilution rates to prevent over-fertilization.
Understanding Plant Dormancy and Feeding
Many houseplants enter a dormant phase in winter, meaning their metabolic processes slow down.
During this time, they need less food and water. Respecting this natural cycle is key to long-term plant health.
Dormancy doesn’t mean your plant is unhealthy – it’s simply a seasonal adaptation.
You might notice signs of dormancy, such as slowed growth or dropped leaves. Recognize these as perfectly normal responses.
Feeding should be minimal or paused during this time. When the light starts to increase as spring approaches, resume a more active fertilizing schedule to support new growth.
Pruning and Maintenance
Taking care of houseplants in winter involves specific tasks like pruning, cleaning foliage, and watching out for pests and diseases.
Proper attention to these tasks ensures your plants remain healthy and vibrant through the colder months.
When to Prune Houseplants
Winter’s a good time to focus on trimming your plants. In doing so, it’s best to prune when plants are dormant, typically during late winter. This helps encourage new growth in spring.
Use clean, sharp tools to make cuts at angles for the best results. Keeping your plants tidy enhances their appearance and overall health.
Regular light pruning is usually sufficient in winter. Make sure you do remove dead or yellowing leaves though to prevent the spread of disease.
In addition, if you notice any branches touching windows or walls, trim them back to avoid damage from cold drafts.
Cleaning Plant Foliage
Dust and dirt can accumulate on leaves, reducing their ability to photosynthesize. It’s important to clean them periodically.
Use a soft, damp cloth to gently wipe each leaf. For plants with many small leaves, a shower under tepid water can be effective.
Avoid using commercial leaf shine products as they can block light absorption.
If you’re dealing with sticky residues, a mild soap solution can help. Make sure to rinse thoroughly after using any cleaning solution.
Regular cleaning helps your plants not only look their best but also function better in lower light conditions common in winter.
Pest and Disease Surveillance in Winter
Winter doesn’t mean you can ignore potential pests or diseases. Even in the colder months, monitor your plants for signs of trouble, such as sticky leaves, webbing, or unusual spots.
This includes that you should inspect both the tops and undersides of leaves.
Common winter pests include spider mites and aphids. If you do see any pests, isolate the affected plant to prevent spreading.
Use suitable treatments like insecticidal soap or neem oil to manage infestations. For diseases, ensure proper airflow around plants and avoid waterlogged soil.
Early detection is key to managing any issues that arise, keeping your houseplants healthy.
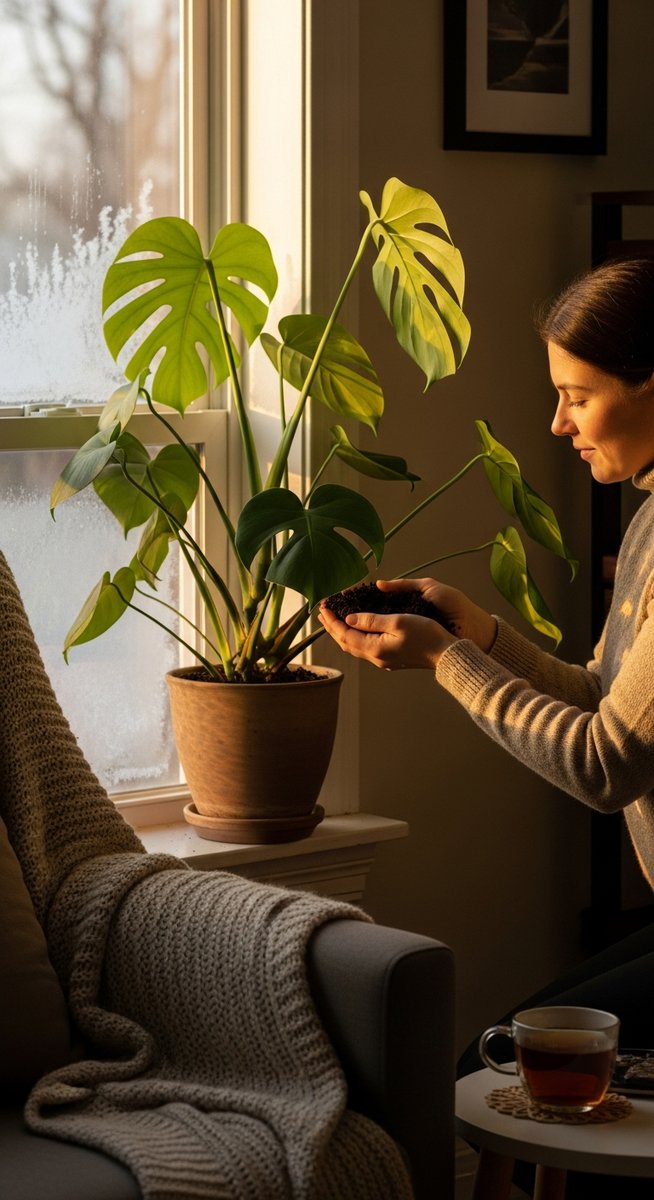
Repotting Considerations in Cold Weather
Repotting your green friends during colder months isn’t always necessary, but sometimes it can’t be avoided.
Winter repotting requires a bit more care. Plants typically enter a dormant phase with shorter daylight hours, so they may not recover as quickly from the stress of being repotted.
Here’s what to consider:
- Choose the right time: If possible, wait until late winter, just before new growth starts.
- Warmth is key: Ensure the room you’re working in is warm. Avoid repotting near drafts or open windows. You don’t want to shock your plants with sudden temperature changes.
- Proper tools: Gather essential tools like a clean pot, fresh potting mix, and gloves.
Repotting Steps:
- Gently remove the plant: Carefully extract it from the old pot. If roots are tightly wound, tease them apart lightly.
- Inspect roots: Trim any dead or rotting roots. This keeps your plant healthy and gives it a fresh start.
- Select the right pot: It should be just one size larger than the current one. A pot that’s too big holds excess water, which can lead to root rot.
Finally, water sparingly after repotting.
Since plant activity is lower during the cold months, they don’t need as much water. Keep an eye on your plants and check soil moisture before watering again.