If you’re a fiddle leaf fig enthusiast, you’ll likely agree that you can never have too many of these beauties. After all, their luscious, lyre-shaped leaves have a way of adding to any room or living space, firmly establishing them as one of the world’s most beloved houseplants. And while they’re prone to be full of nonsense in terms of their care, keeping them happy and healthy is infinitely rewarding, especially when they’re growing strong.
And if you’re looking to spread the Ficus lyrata love, you may be wondering exactly how to propagate fiddle leaf fig trees. Of course, it goes without saying that you should only attempt this with healthy plants that have stems and leaves to spare. This is to give yourself the best possible chance of success.
Before propagating, it’s also good to do your research to establish which method will work best for you and your plants.
In this post, I’ll take a deep dive into everything there is to know about propagating fiddle leaf figs, including how to go about taking cuttings from them, how and where to grow your cuttings, and what season is best for attempting this process. Read on to find out more!
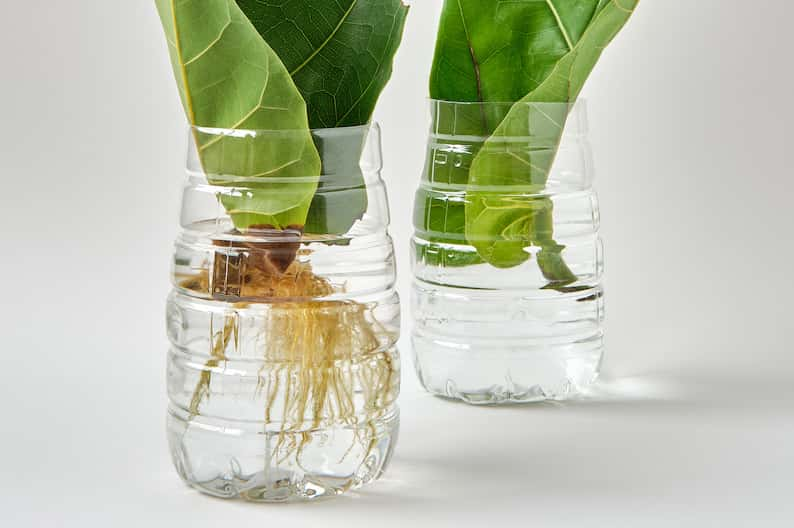
Table of Contents
How to propagate a fiddle leaf fig
There are various ways to propagate fiddle leaf figs, all which can work very successfully if undertaken correctly. You can propagate a single leaf in soil or water, or you propagate via a process known as air layering. Each method has pros and cons, but your selection depends on your preference.
The very thought of hacking away at your fiddle leaf fig can be intimidating. With their reputation for being challenging to grow, many potential fiddle leaf fig propagators are put off straight out the gate. However, multiplying your plants is both easy and rewarding if you know what you’re doing.
There are a few things to look out for before deciding to take cuttings from your plant. You will need to evaluate its overall health and establish if it has leaves and stems that you don’t mind losing. Bear in mind that a little pruning of your fiddle leaf fig is ultimately healthy for your plant, so don’t overthink your decision too much.
Furthermore, it would be best to prepare your workstation before beginning the propagation process. Make sure you have plenty of space and clean, sterilized tools. Have the necessary materials on hand, like your potting mix, if you’re propagating in soil or via air layering. Indeed, your soil may require some preparation before it’s ready for a cutting.
In the following sections, I’ll take you through how to propagate a fiddle leaf fig in greater detail, from taking a cutting to preparing your soil to how long you need to wait to see new growth. I’ll focus on soil propagation for this section, with the air layering and water methods following later on.
1. Consider when to propagate your fiddle leaf fig
The best time to propagate a fiddle leaf fig is during its growing seasons, in the spring and early summer. In the winter months, Ficus lyrata tend to enter a period of dormancy during which they use and expend very little energy. Propagation, as you can imagine, takes quite a bit of work.
That being said, indoor plants present a slightly different case. Most home environments maintain a pretty consistent temperature throughout the year, and there is a good chance you can successfully propagate your fiddle even during the colder months. If your home is humid and warm enough for your plant to produce new growth throughout the year, by all means, give it a go.
2. Evaluate your fiddle leaf fig for propagation
Before taking clippers to stem, have a good hard look at your fiddle leaf fig. Any signs of ill health, such as if your fiddle leaf fig’s leaves are drooping, wilting, or have brown and yellow spots, indicate that your plant may require some wellness intervention. Also, be on the lookout for signs of insects or pests.
Should your plant be a little under the weather, it’s unlikely to be a good candidate for propagation. Rather allow it the time and energy it needs to recover. You can attempt to propagate, but there is no guarantee of success.
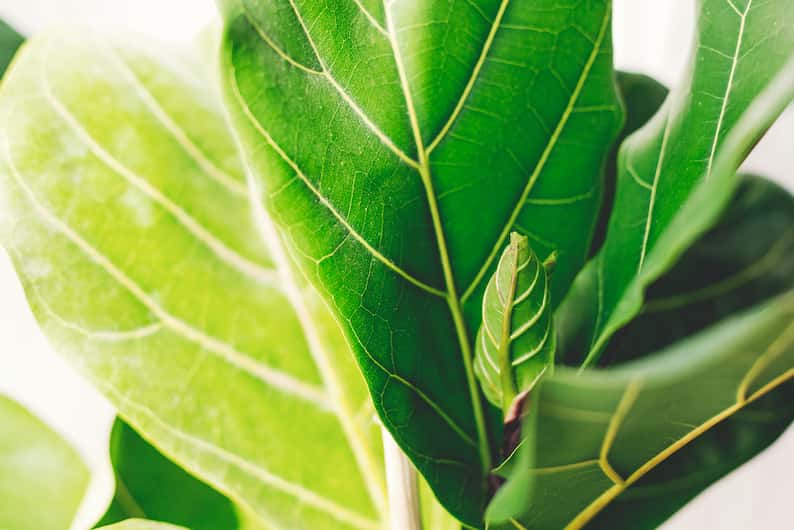
A healthy plant is devoid of marks or blemishes, upright standing and voluminous in terms of foliage. Check where your fiddle leaf fig’s nodes are located, as this is the location where you’ll be making your cuttings.
3. Prepare your workspace
As mentioned, it’s important that you have a clean, spacious work area before attempting propagation. You’d be amazed at how quickly diseases can spread between plants, particularly on cutting tools. A good workspace will also keep you focused on the task at hand.
4. Prepare your planter and soil
If you’re planning to propagate via a cutting grown in soil, it’s crucial that you prepare your soil in advance of making the snip. Fiddle leaf figs are very particular about the soil they thrive in, with the best soil for fiddle leaf figs generally being a well-draining and porous mix with good moisture retention.
Best soil for Fiddle Leaf Figs
Miracle-Gro Tropical Potting Mix
Light and well-draining (perfect for avoiding root rot) while being packed with just the right nutrients – that will feed your plant for up to six months. The best soil for keeping your fiddle leaf fig healthy and strong.
While most nurseries and garden centers sell soil mixes specific to houseplants, you may want to consider mixing your own. This process is simple and really only involves adding moisture-retaining material like peat moss and perlite to good quality organic earth.
For your fiddle leaf fig’s planter, select one of a good size with proper drainage holes. This can be any plastic container big enough to hold a large fiddle leaf fig tree comfortably, as they tend to root quite deeply. Once your cutting starts growing, you’ll want to avoid disturbing it, so make sure it has enough room.

5. Make your cutting
How and where you make your cutting can be the make-or-break part of the propagation process. Where you cut, and the angle at which you approach the stem will impact how well your plant heals and how easily your cutting roots.
Opinions vary when it comes to making straight cuts versus angled cuts. Many prefer angled cuts as they provide a greater surface area from which new growth can spring. On the other hand, they also leave a bigger wound on your parent plant, which is by default more accessible to fungal or bacterial infections.
Personally, I think it’s perfectly okay to make angled cuts as houseplants are less likely to be at risk of contracting infections. Straight cuts can also be effective, but they slightly lower the chance of your leaf developing roots.
Where to cut a fiddle leaf fig to propagate
To cut a fiddle leaf fig to propagate, cut just below the third node on a stem that ideally has two to three leaves on it. That way, the cutting will have enough leaves to sustain itself without requiring too much energy to survive. You must also cut between nodes, as cutting on one will take it out of action.
Possibly the most crucial part of any plant propagation process is where you make your cut. This will determine if your cutting has a good chance of growing. It will also impact new growth on your parent fiddle, as buds and stems tend to grow from pruned areas.
When it comes to fiddle leaf fig cuttings, a good specimen has at least three nodes. Nodes are areas on your plant where leaves or branches are located. It is also where new growth starts and so each node represents a potential spot for roots to grow in the soil. Between each node, there is a section known as an internode, which is the prime cutting location.
6. Add rooting hormone
Before submerging your cutting in soil, you can give it a little artificial assistance by dipping it in rooting hormone. Woody plants like the Ficus lyrata respond particularly well to this substance, and it goes a long way to improving your chances of successful propagation.
Not only does the rooting hormone stimulate new root development, but it also speeds up the process in general. To apply rooting hormone, all you need to do is dip the end of your cutting into the powder and knock off any excess before planting it.
7. Water your soil
Before planting your cutting, the next step in propagating your fiddle leaf fig is to thoroughly water your prepared soil and allow the excess to drain. Damp soil will support your cutting and keep your rooting hormone in place. Watering after the fact may knock your cutting off balance and wash away your supplemental hormones.
That being said, do not water your fiddle leaf fig’s soil to the point that it is soaking and waterlogged. This will make it difficult for new growth to mobilize. A generous dousing will suffice.

8. Plant your cutting
Once you’ve made your cutting and dipped it in growth hormone and your soil is prepared and watered, it’s time to plant your cutting. Before you do, you want to remove any lower leaves. Leaving them submerged in the soil can lead to molding, which in turn leads to fungal and bacterial infections.
Cut with a clean and sterilized clipper when you remove the lower leaves. Avoid tearing them off, as this creates wounds on your cutting. Clean snips have a better chance of healing.
To plant your cutting, submerge it one-third of the way into your planter. Once firmly ensconced in the soil, pat down the ground around it so that it is lightly compacted. This will keep it supported without eradicating the space it needs for new roots.
9. Care for your cutting
Getting your cutting into the soil is definitely not the last step in propagating a fiddle leaf fig. After this, the real fun starts when you have to care for it. The time from planting to rooting is very delicate, and it’s in your best interest to do everything you can to tend to its needs. Fiddle leaf fig care is an ongoing process.
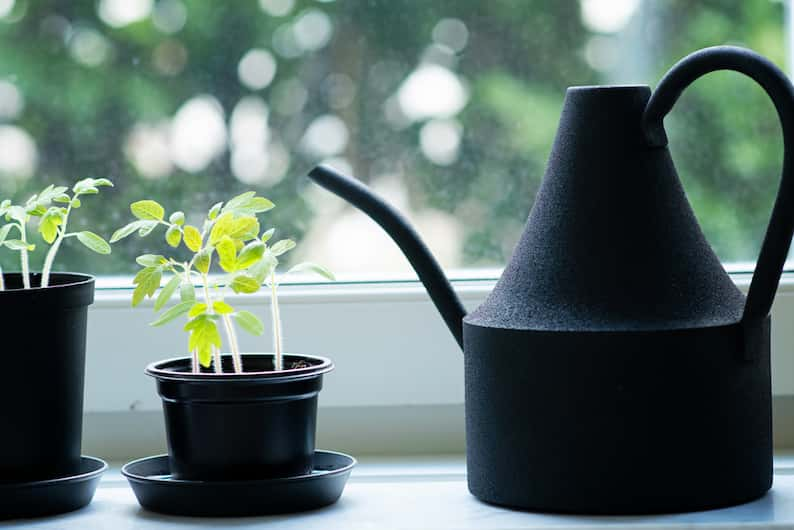
Newly planted cuttings love moisture, and a great way to ensure they have access to it is to cover them lightly with plastic bags. Mist their leaves daily, as this also provides them with humidity, which they crave. The reason misting is important stems from the fact that new cuttings lack roots, so they are unable to gather hydration from the soil.
Allow the top layer of their soil to dry out between watering sessions, and if you feel your leaves are listless, cut them in half to prevent too much hydration loss. In terms of the light needs of your fiddle leaf fig, keep your cuttings in a spot where they receive 6 to 8 hours of bright, indirect morning light every day, preferably by a closed window.
10. Root your cutting
With proper care, a good soil mix, and plenty of moisture and humidity, you can expect your cutting to begin rooting within 4 to 6 weeks. At two inches, your cutting is ready to move into its permanent spot. While this is a huge achievement and a proud moment for any plant parent, it by no means indicates that the hard part of fiddle leaf fig propagation is over.
Conversely, the first months (up to two years) of a fiddle leaf fig’s life are tentative. This is when they are most unsettled and most averse to major changes. In terms of how fast fiddle leaf figs grow, don’t expect too much on that front. It’s also fairly common for diseases like root rot in your fiddle leaf fig to appear during this time. Once potted, it is not advisable to transplant your fiddle leaf for at least two growing seasons.
11. Take care
One key consideration to keep in mind when learning how to prune and propagate a fiddle leaf fig is that they contain a white, sticky sap which is a mildly toxic irritant when it comes into contact with human skin. As such, for your own safety before you go to propagate fiddle leaf figs, wear gloves when you’re taking cuttings and try to avoid touching your skin or eyes.
How to propagate a fiddle leaf fig by air layering
Air layering is an intricate propagation technique that involves you making incisions in the plant tissue of a branch without removing it from the parent plant. These incisions are dusted with rooting hormone and covered in dampened moss before being wrapped in plastic, sealing in moisture. New roots then grow from the incision.
With this technique and the new roots that result from it, the idea is that the new roots draw energy from the parent fiddle leaf fig and the added rooting hormone supplement. Once the baby roots are two inches long, the whole branch can be removed and planted in its own container, where it should be stable enough to support itself.
Air layering is the technique I would advise trying for larger cuttings, particularly those with many leaves. Staying attached to the parent plant means it can draw extra energy and moisture via its root system, which isn’t possible for rootless cuttings in soil. It also means a more attractive and bigger new plant right from the get-go.
This method is similar to notching a fiddle leaf fig, which is the process whereby small cuts are made in the stem and branches of a fiddle leaf fig to encourage the growth of new buds and leaves.
Can you propagate a fiddle leaf fig in water?
It is indeed possible to propagate either a cutting or a single leaf in water. This is an uncomplicated process whereby your specimen is set in a glass container with water close to a window providing 6 to 8 hours of bright indirect light every day. You should replace your water twice weekly.
This is another method where reviews are mixed. Many people are incredibly successful when propagating their fiddles in fresh water, but others have never seen them root. Over time, I’ve learned a few tips and tricks to give myself the best chance of success.
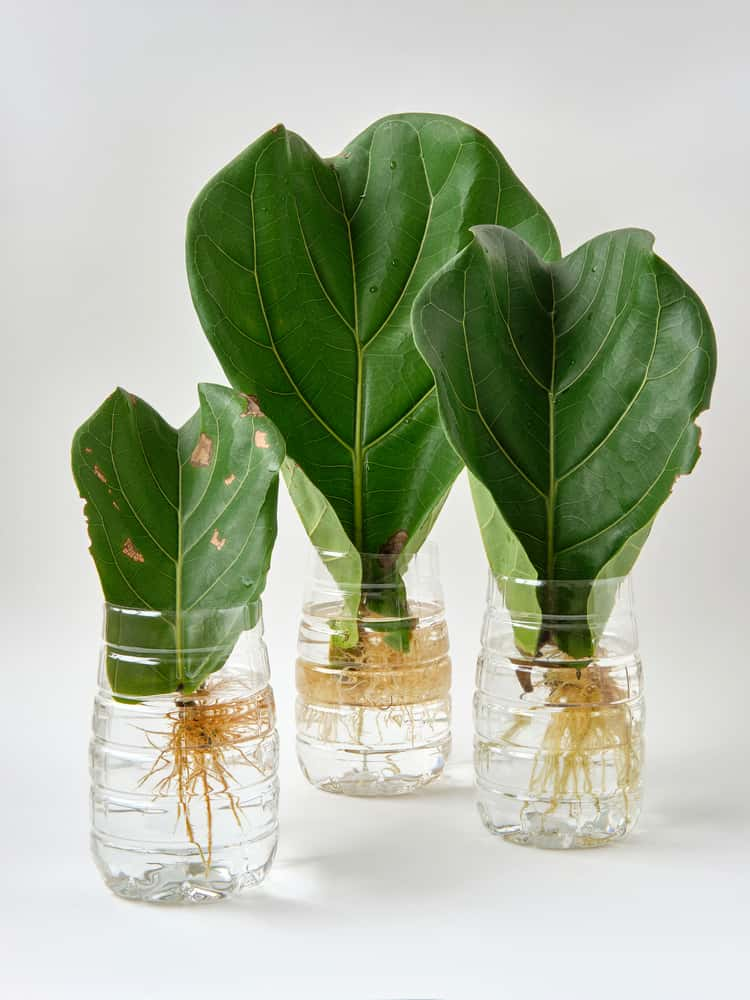
For one, it’s best to use a cutting with at least three nodes, purely because that equals three opportunities for new growth. Single leaves have been known to root in water, but they are finicky, and the success rate is far lower.
A very important part of making this technique work is ensuring you change the water in your glass container frequently. This is to ensure your cutting or leaf has constant access to oxygen. Water that has been standing for days will cease to benefit your plant. With this technique, you should see new roots within six weeks.
How to propagate a fiddle leaf fig in water
Fiddle leaf fig water propagation is a simple process that can deliver results in as little as six weeks. The benefit of this method is you can see the roots forming through the glass. All you need is a clear vase, fresh water, and a suitable cutting.
Many may argue with me, but I think this method is ideal for beginners and seasoned plant parents alike. Watching new roots form through glass is an unbelievably gratifying process. Fiddle leaf fig propagation in water is easy and straightforward and requires very little maintenance.
On the other hand, I’ve heard many stories of people trying this method time and time again with little to no success. My experience with these beautiful plants has shown me that it’s as much about where you place your plant as it is about refreshing its water and selecting an appropriate cutting.
Let’s look at propagating fiddle leaf fig in water and what you can do to bolster your chances of success.
1. Inspect your plant and select an appropriate section for cutting
As mentioned in a previous section of this article, it is very important that you only take cuttings from healthy fiddle leaf figs. If they’re unwell or in distress, your chances of successfully propagating a fiddle leaf fig drop significantly.
Once you’ve established that your Ficus lyrata is okay to cut, you can move forward with selecting a branch or leaf to remove. Cuttings with three nodes are ideal, but single leaf propagation is also a viable option. Just ensure there is a visible node from which new growth can emerge.
2. Prepare your glass container and water
Fiddle leaf figs propagating in water are really rather attractive. For this reason, why not go ahead and choose a nice glass container to show them off? When you are choosing one, make sure it’s quite roomy. You don’t want your cutting to feel suffocated. Ideally, the growth point should not be touching the bottom of the glass.
In terms of water, regular old tap water will do.
But here’s a top tip – allow the water to stand for a day before housing your cutting in it. This will allow the chlorine in the water to evaporate, which improves your chances of successful rooting.
3. Make your cutting
Once you’ve identified your prospective leaf or cutting, it’s time to make the snip. Wear gloves to avoid getting your fiddle’s toxic white sap on your skin, and make a clean, diagonal incision above or below a node. Try to get your cutting into the water as soon as possible so that it doesn’t dry out too drastically.
4. Find the perfect spot for your cutting
Sunlight makes all the difference. Without sufficient light, fiddle leaf figs cannot produce enough energy to make new roots. This is why the spot where you place your cutting is so important.
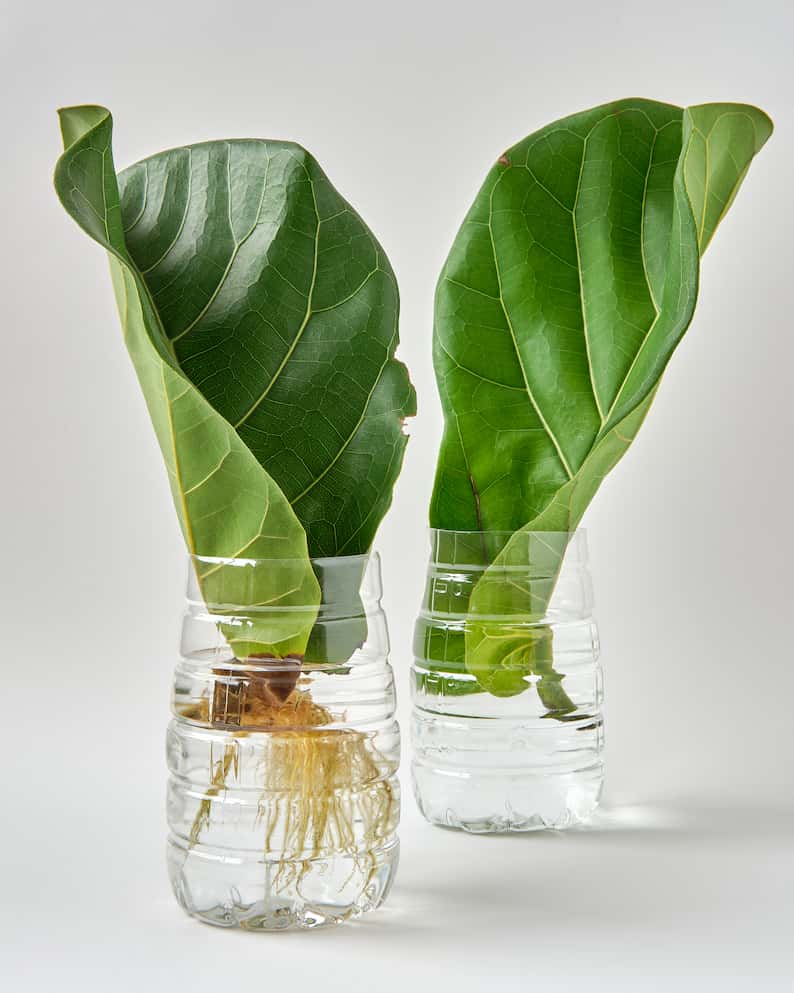
When it comes to rooting in water when trying to propagate a fiddle leaf fig, I always recommend a location near a closed window that receives 6 to 8 hours of bright but indirect sunlight every day. The morning sun is better, as it’s far less harsh than the strong rays of the afternoon.
Once you’ve settled your fig in a specific place, don’t move it unless you need to change its water. You can rotate it every few days, but major location changes will negatively impact its growth.
5. Ensure your fiddle leaf fig’s growing environment is humid enough
Native to West Africa, fiddle leaf figs love humidity. Generally speaking, a home with medium to high humidity will suit them well, but when propagating, you may want to lend them a little additional help moisture-wise.
To do so, you can place a humidifier close to the spot where your cutting is situated. This will give them a little boost and improve their cell production.
6. Plant your cutting
Once your fiddle cutting or leaf has developed at least two inches of new roots, it’s time to plant it. Before you do, prepare your fiddle leaf fig’s planter with high-quality potting soil that is preferably mixed with perlite and peat moss for water retention.

Of the utmost importance is ensuring your pot has good drainage holes and room for its roots to settle. Water the soil thoroughly before placing your cutting so that it is supported. Then, place the cutting a third of the way into the ground and select a sunny spot for it to live.
As with all propagated fiddle leaf figs, try to avoid moving or transplanting them for their first two years of life.
7. Care for your new fiddle leaf fig
If you’ve successfully propagated a fiddle leaf fig in water, congratulations! You now have a new and fully-fledged plant.
To care for it, make sure it has plenty of water (but don’t drown it), lots of light and humidity, and a regular feeding schedule. Keep an eye on its well-being for the first few months to ensure it is established and happy.
Best fertilizer for Fiddle Leaf Figs
Miracle-Gro Water Soluble All Purpose Plant Food
A great fertilizer with the perfect balance for your fiddle leaf fig. Simply dissolve in water and feed your plant to watch it thrive.
Can you propagate fiddle leaf fig leaves?
It is possible to propagate a fiddle leaf fig from a single leaf, although not always as successful as stem cuttings. The best way to go about this method is to make sure you use a clean, sharp tool and cut as close to the stem as possible. Single leaves can be propagated in either soil or water.
There are definitely two camps when it comes to leaf propagation. Some love it, while others rarely see new roots. To my mind, the important aspect of this method is light, which helps fiddle leaf figs to generate energy for growth.
Together with this, it’s important to use good-quality soil, or if you’re propagating in water, to refresh it regularly. Once these measures are in place, it’s the luck of the draw. Even the most beautiful cuttings sometimes don’t grow for no apparent reason. So, don’t be too hard on yourself if you don’t get it right the first time.
Can I propagate a fiddle leaf fig in winter?
It is not advisable to propagate a fiddle leaf fig in winter unless you have an indoor space where the temperature and humidity levels are consistent and your parent plant hasn’t entered a phase of dormancy. Instead, it’s best to propagate in the spring or summer.
Fiddle leaf figs are heat-loving plants, and they thrive on sunlight. For this reason, it follows that they experience their best growth in the hotter months of the year. When they are actively growing, they are best suited for propagation.
Of course, it is entirely possible to propagate this beauty all year round, particularly if they’ve shown growth during all stages of the year. That being said, cuttings require even more light than established plants, so make sure there is a window spot that still gets sun, even when it’s cooler outside.
How hard is it to grow a fiddle leaf fig?
Fiddle leaf figs aren’t especially hard to grow, including from propagation. Ensuring they have enough light and don’t retain too much moisture are some key issues to look out for as they are growing, as the fiddle leaf fig can be a bit sensitive when these needs aren’t met.
Often, one of the best things you can do after propagating a fiddle leaf fig to help it grow is to leave it alone. They’re not very much in favor of any changes, with propagation probably being one of the biggest ones that a plant can experience. This is why I recommended earlier to do the bare minimum for up to two growing seasons to your fiddle leaf fig after propagating it.
That doesn’t mean that you shouldn’t be watering it or keeping an eye on how much light it’s getting during that period. Both are important but, ideally, you’ll avoid other major changes during that time. For example, in terms of the question of when to repot a fiddle leaf fig, the answer is “definitely not now”. Doing so straight after propagation can be too much for an already tenuous fiddle leaf fig and it might just give up if it has to deal with two such situations in a short period of time.
How long does it take to root fiddle leaf fig cuttings?
Your fiddle leaf fig cutting will root in around four to six weeks if it gets the appropriate care, no matter if you’re propagating in soil or water. This includes ensuring that it has the right amounts of light, moisture and humidity and, if it’s being propagated in soil, that high-quality potting mix is used.
Simply rooting a propagated fiddle leaf fig cutting isn’t a guarantee of success, so make sure you continue to keep a close eye on it to ensure it continues to thrive. In particular, if you find it’s not sticking to the expected fiddle leaf fig propagation timeline, it doesn’t mean the cutting has failed but you may want to check that all its needs are being met if it really starts to take too long.
Once it gets to the two inch long mark, this is when you’re now fine to move it to its longer term home. Try to pick somewhere where it will be able to grow undisturbed. Fiddle leaf figs really don’t like being transplanted after a cutting is planted – in fact, this is actually why I recommend not repotting it for two growing seasons, if you can avoid it.
But assuming all of that is in order, congratulations on your new propagated fiddle leaf fig! I have no doubt that you and your growing plant family will be very happy together.


